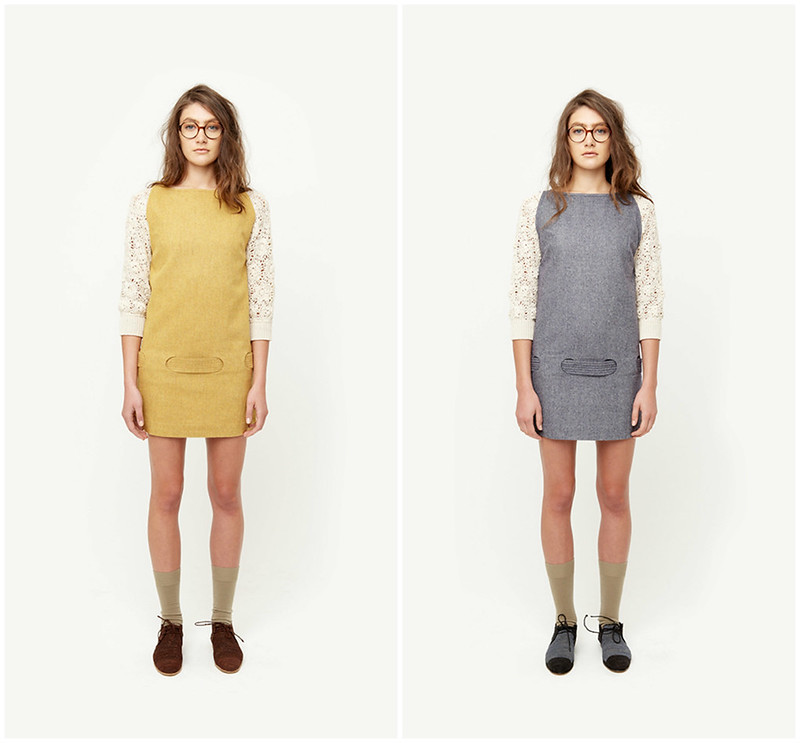
When I see things like this, it makes me want to rip my sleeves off and knit some new ones. Like I said yesterday, I love mixing media. I feel like tiny details like, 'oh yeah I sewed this dress, and knit the sleeves' make it EVEN BETTER than just handmaking something. Details are everything.
arabella ramsey fall 2012
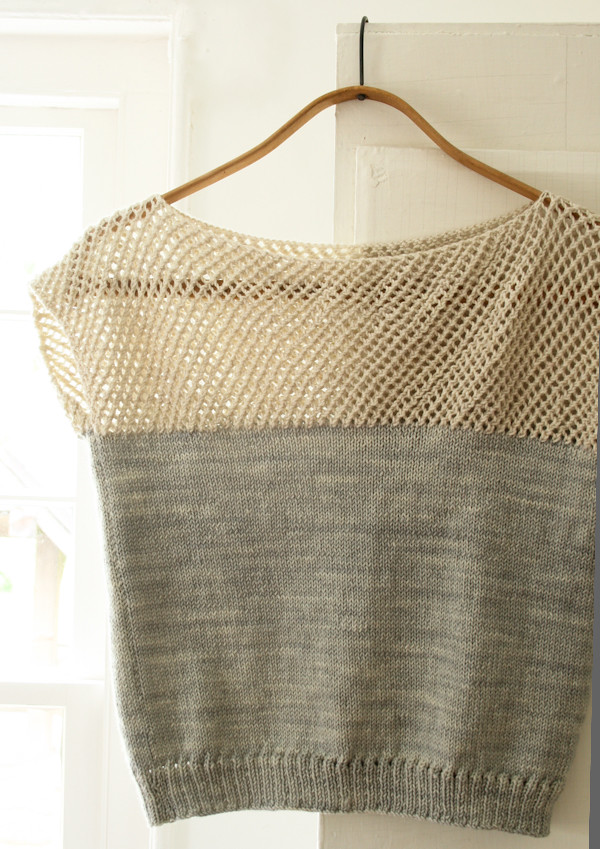
In addition to adding some fun elements to an existing garment, I also came across this cap sleeve lattice top knitting pattern. Again, from purl soho. I swear I don't work for them, I just love all of their stuff! I feel like it's rare to find fashionable knitting patterns, and this one is done so well!
I could seriously live in this thing in the summer. The pattern looks pretty great, but I think that I would modify it to be knit in the round, to eliminate the seaming. I could also see a version of this in 2 colorblocked colors as well, or half in neon. So many options!
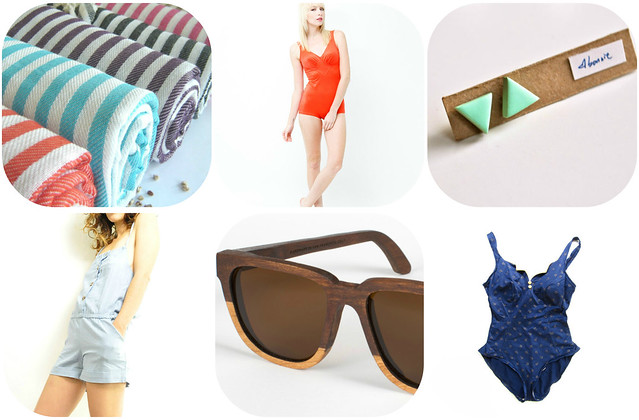
even though it's mid-june, summer still isn't in full swing in NYC. so i've been doing a bit of beach time dreaming. i'll be heading out to our greenport house in july and august, and here are a few of my favorite resort wear items perfect for the beach.
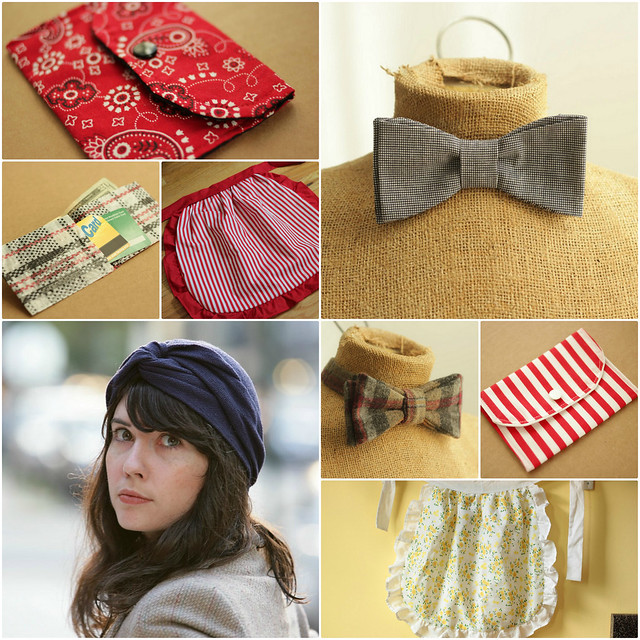
As you've probably guessed from my (sorta) recent pattern-testing posts, I've had a new shop in the works. And, it's finally open! It's called I Make It; You Make It and has digital PDF sewing patterns and tutorials. The patterns are mostly fashion related with a vintage-inspired twist. Through the years, fashionable sewing patterns have been hard to come by, which generally led me to creating my own patterns. Now I've been digitizing them, and writing up easy-to-follow, detailed instructions with photos to go along with the patterns.
As a follower of the blog, take 20% off any of the patterns by entering GRANDOPENING when you checkout, available until June 25th. You can have a looksy at the DIY sewing patterns in the shop, or sign up to get an email whenever a new pattern comes out (about once a month).
The Patterns
Right now the shop includes:
A men's bowtie that is custom-fit to the wearer and closes with a hook and eye in the back.
A women's turban made from a stretchy knit that wraps around for a custom fit
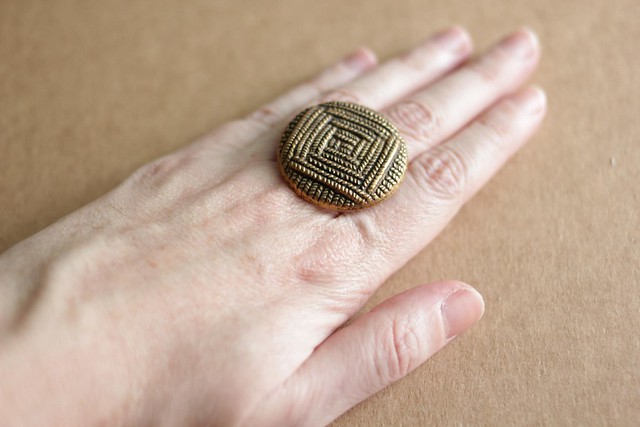
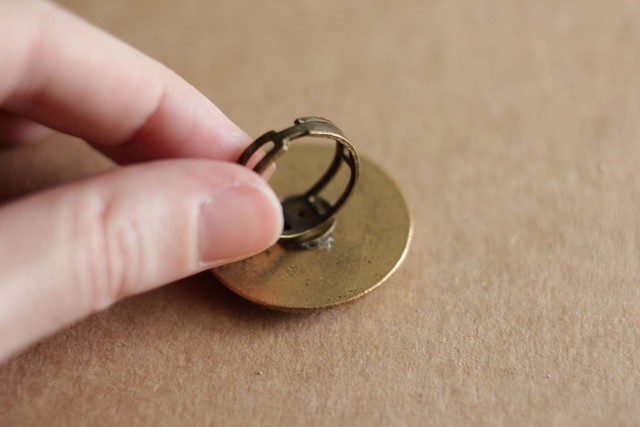
This is a tutorial to show you how to make a ring out of a vintage button. I see so many great vintage buttons, either randomly at a yard sale or thrift store or a part of an old sweater or shirt that I don't want to wear anymore. Buttons are little treasures that are great because they can be so fun, with a lot of detail. There's a bunch of stuff you can do with them, and I'm sort of button hoarder. If there's a nice set of them, I like to replace boring buttons on a shirt with fun colored ones. And below, is how to turn a button into a pretty ring.
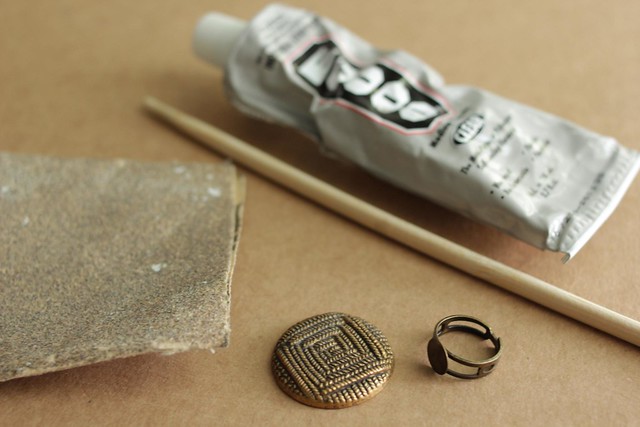
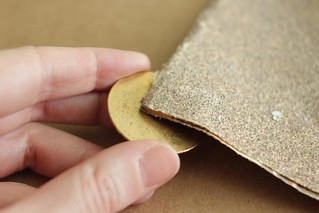
Using the sandpaper, gently sand the back of the button, and the flat surface of the ring blank. The flat smooth surface of the button/ring blank doesn't give the glue enough to really bond to, so by roughening up the texture a bit it will make your glue hold better. Make sure you don't go crazy here, and try to only sand the button where the ring blank will attach.
Step 2
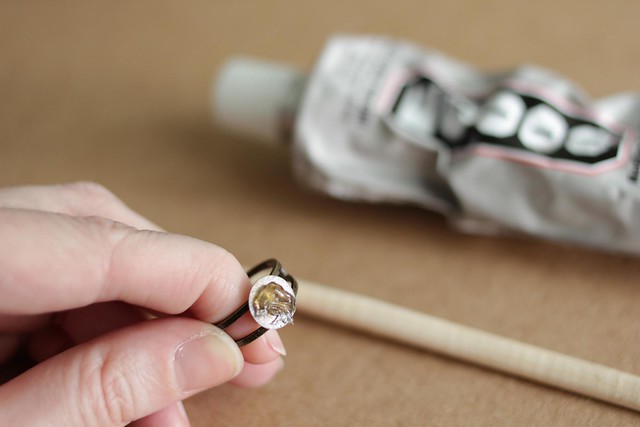
Apply a small dollop of glue with your chopstick to your ring blank. The key here is not getting too much. You want enough so that when you press the ring on it forms a solid layer, almost forming a suction, and only the tiniest bit peeks out the edges, but not so much that you have to wipe it off.
Step 3
Now press on your ring gently just enough that the glue spreads evenly across and you have a nice layer of glue in between. Don't press too hard where you squeeze all of the glue out of the sides. Now, set it aside and let it dry for a good 24 hours before you wear it.
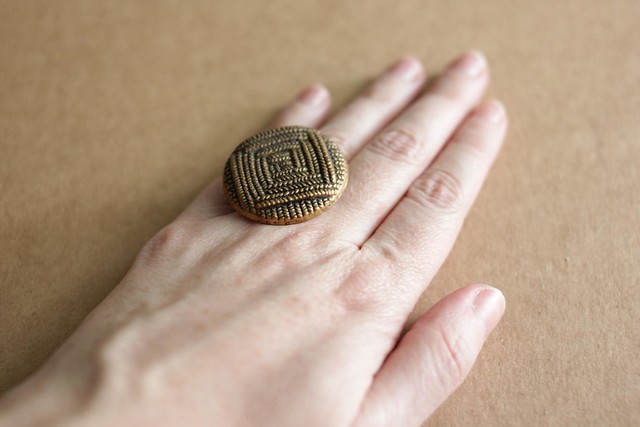
Now you have a new ring! You can get pretty creative with these, and soon you'll be looking for anything with a flat surface to make rings out of. You can also make rings from geode stones with a flat back, vintage pendants, sliced agate, stone chunks like pyrite, or even little knit items like bows or hearts.
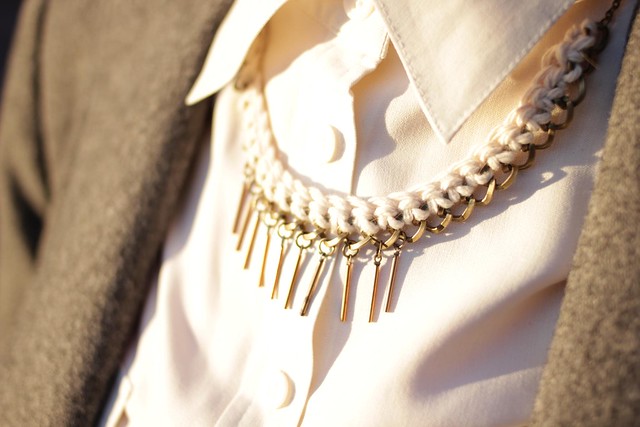
Happy Monday! It was a beautiful weekend, and I tried to spend as much time outside, and stay on the periphery of st. patrick's day madness. I spent some time lounging in the park, and having delicious dinner and cocktails with friends. And finally made some time to photograph me wearing my latest rope necklace.
This one is a little bit of yarn, crocheted to a chain with vintage brass fringe. I love the way it looks worn under a buttoned up collar. I think many of the times when I leave the house in the morning, I look a bit school marmish.
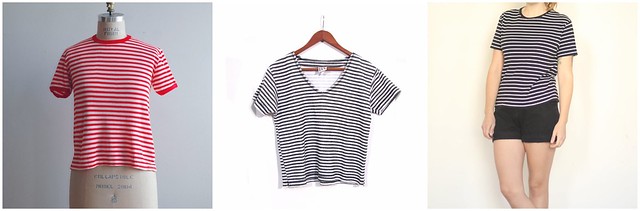
In New York, it's finally spring-like out and my mind has suddenly started to drift towards chambray dresses, bright colors and pastel shoes and pants. And for the first time in months I was able to get out of the house without tights and a big heavy coat. yay, spring! even though the winter hasn't been too harsh, I'm super excited about pulling out my spring clothes from storage (it's always a surprise) and buying new stuff. I've already bought 3 new pairs of sandals! For spring fashion inspiration, I was perusing the steven alan spring 2012 look book and thought how pretty and simple everything was.
Or, I think A lot of these pieces could easily be made. Especially the chambray shirt dress, blue shift dress, striped tee, or the green dress. I think the patterns could easily be whipped up by the slopers and instructions included in the Built By Wendy Dresses book. I actually am 95% finished with a shirt dress identical to the first picture that I made with the BBW book, but in a blue and white striped seersucker fabric. Maybe it's time I finally finished it!
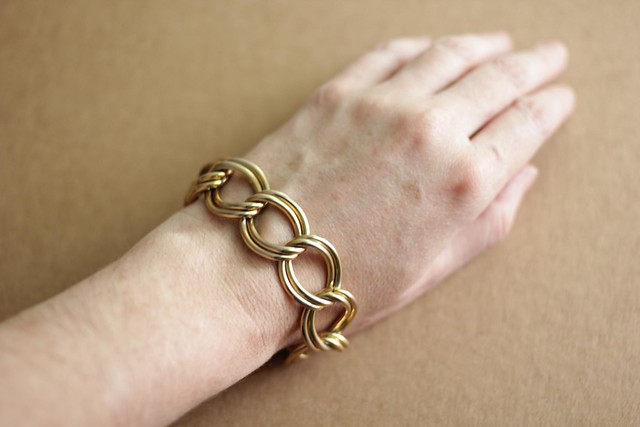
Here's a tutorial on how to make a basic chain bracelet, for your very own DIY bracelet arm party. I like the look of colors of the crazy circus arm, with friendship bracelets, chain bracelets, rhinestones and bangles, but sometimes it's nice to have just a simple, basic bracelet to throw on. The good thing is, this chain bracelet stands alone well, or can serve as a foundation to a crazy arm circus. And, the technique is simple, and you can apply it to any chain you find, so you can make all kinds of different styles.
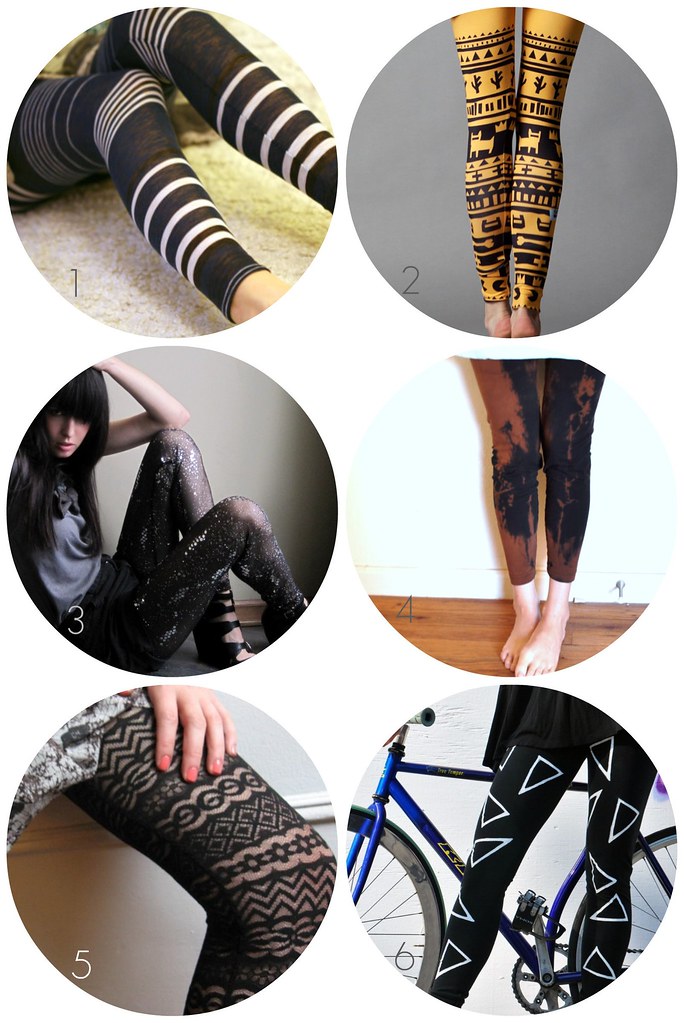
Leggings are popping up everywhere, and I love how fun they are! It's like having crazy pants and leisure pants, all built into one. Below are some of my favorites to buy, or if you're feeling crafty, here's a list of DIY leggings patterns to show you how to make your own leggings!
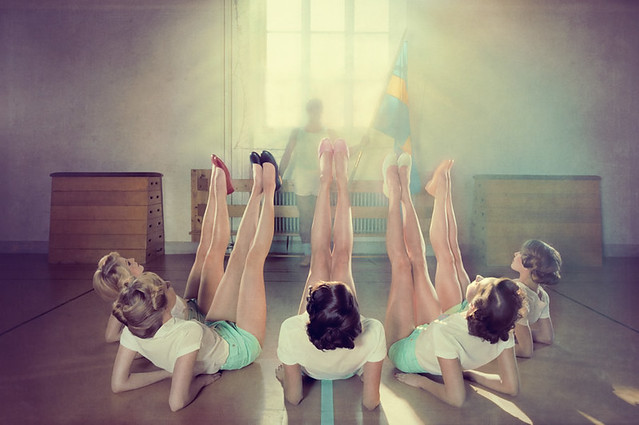
P.S. now I've got silly ZZ Top stuck in my head. When I was about 7, for some reason the She's Got Legs video translated for me "what it meant to be a woman". Lacy socks + heels. I saw the video and thought, I've got socks like that! I ran and put on my sunday school ruffle socks and a pair of my mom's heels, and wore them around the house thinking, So this is what it feels like.
P.P.S. speaking of heels...i am SO excited...I just spent the most amount of $ I ever have on a pair of shoes, and bought these PINK swedish hasbeens. I've wanted some for forever, and I couldn't resist 20% off via A Cup Of Jo with code ACUPOFJO.
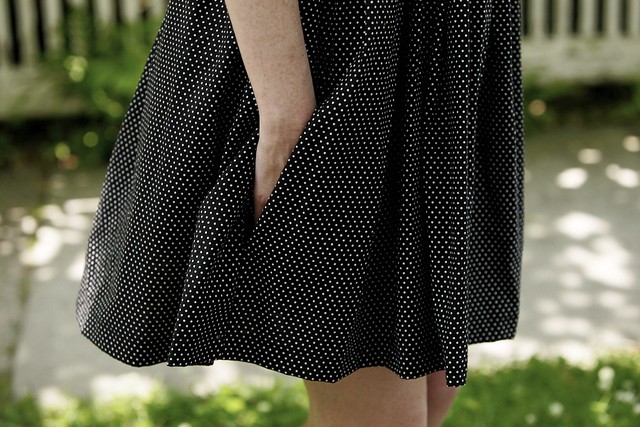
This sewing tutorial explains how to make a pocket, gives you a pocket pattern, and tells you how to add an in-seam pocket to any dress (or pants, or anything really), making it SO MUCH MORE USEFUL. Pockets are essential, otherwise, where are you going to hide your hands and uneaten snacks?
Keep reading for the pocket pattern/tutorial, or you can check out my other DIY patterns.
Step 1: Print out the pocket pattern (And start hoarding your snacks)
Download and print out the pocket pattern; cut out 4 pocket pieces. (the pattern stretches a little into the margins — sorry, i like big pockets!)
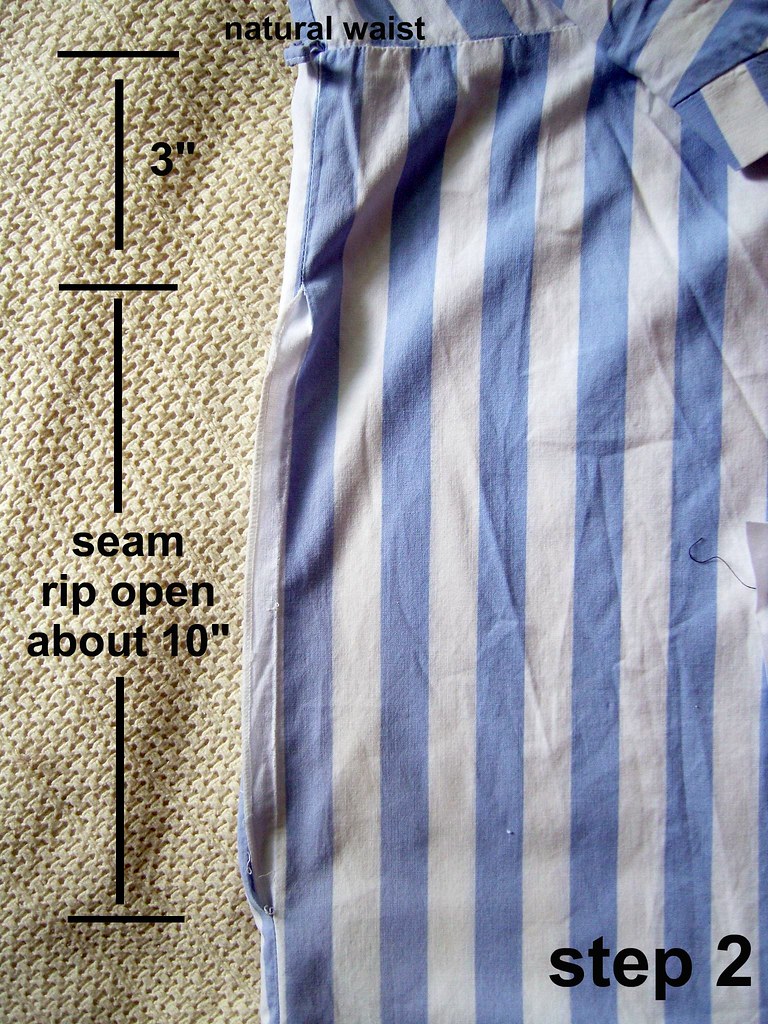
Step 2: Rip those Seams
Beginning about 3 inches below the natural waistline, start ripping the seam until you have a 10" hole. **Note, this is your natural waistline, which is much higher than where your pants waistline is. Your natural waistline is a few inches above your belly button.
Step 3: Sew your Pockets
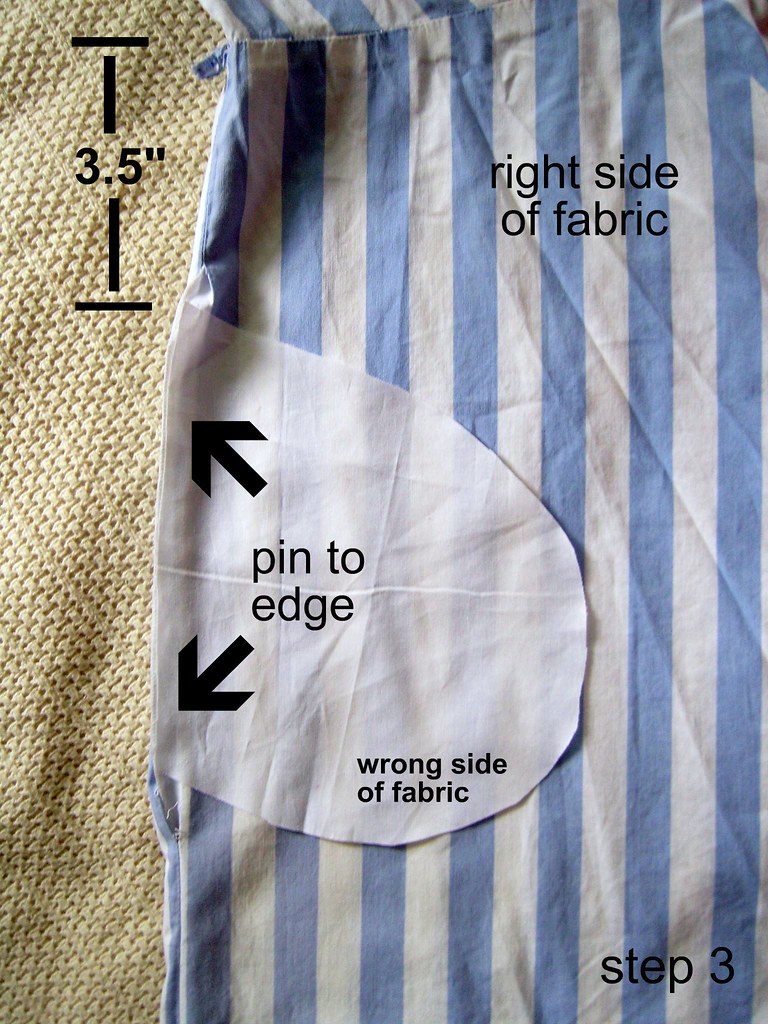
Place 1 pocket piece on the front of the skirt, right sides together, 3.5" below the natural waistline, lining up the edge of the pocket with the edge of your skirt. Pin in place. Now do the same thing on the back of the skirt, pin another pocket piece, in the same location (also, right sides together).
Step 4: Start Stitching
Stitch the front pocket to the front of the skirt, using 3/8” seam allowance. Stitch the back pocket to the back of the skirt the same way. (You are using a 3/8” seam allowance so that in the end, your pocket fabric actually starts a little inside the skirt seam allowance…making it invisible from the outside)
Step 5: Press
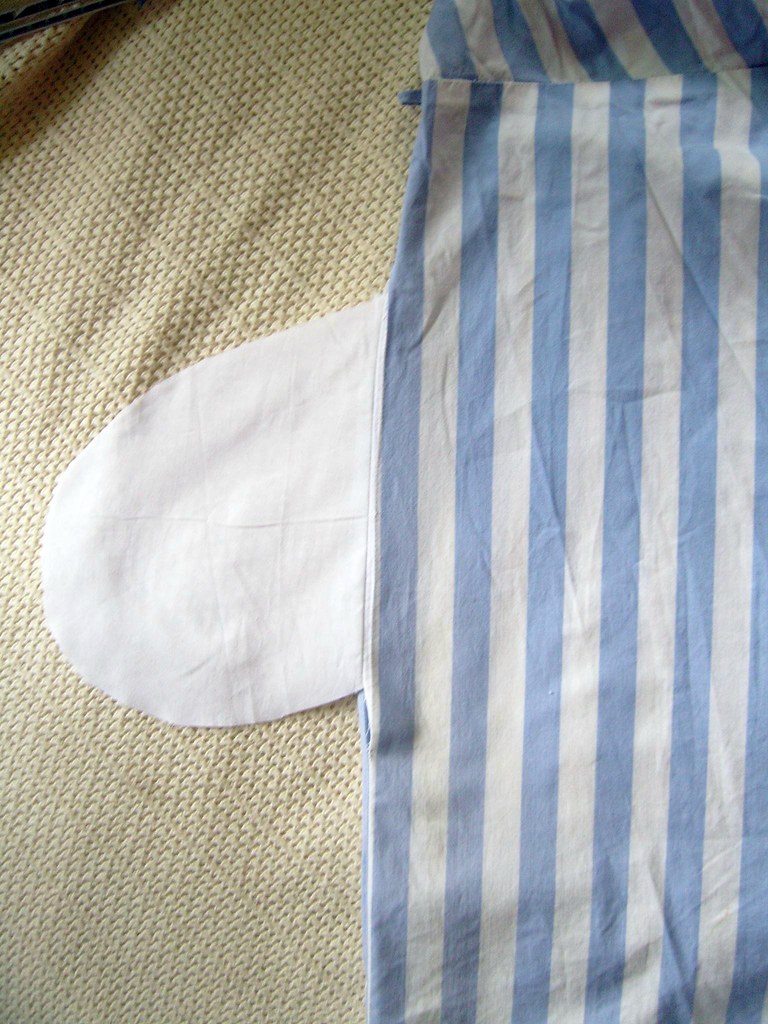
Press the seam open...
Step 6: Press again
...then fold over the pocket and press it flat.
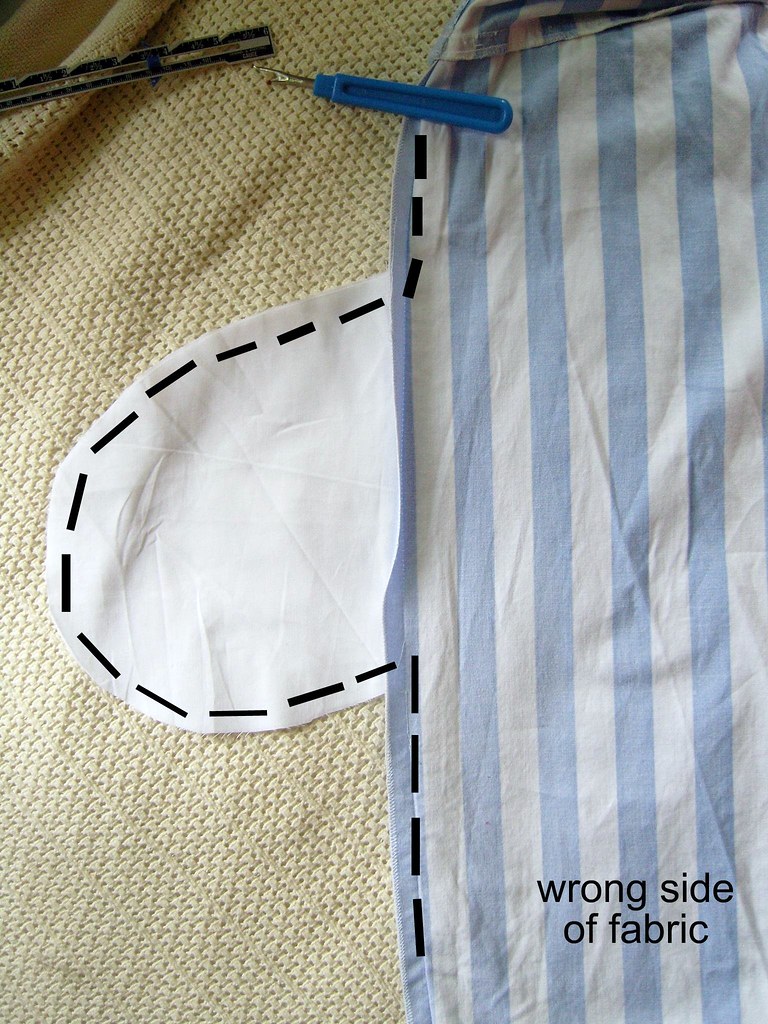
Step 7: Stitch all the way around
Turn your skirt inside out. With front and back skirt pieces right sides together, stitch along the seams and around the pockets using 5/8” seam allowance…in one continuous stitching line. Make sure your seam allowance matches the existing skirt seam allowance, and stitch over the existing side seams at the top and bottom just a bit to make sure everything is put back together nicely.
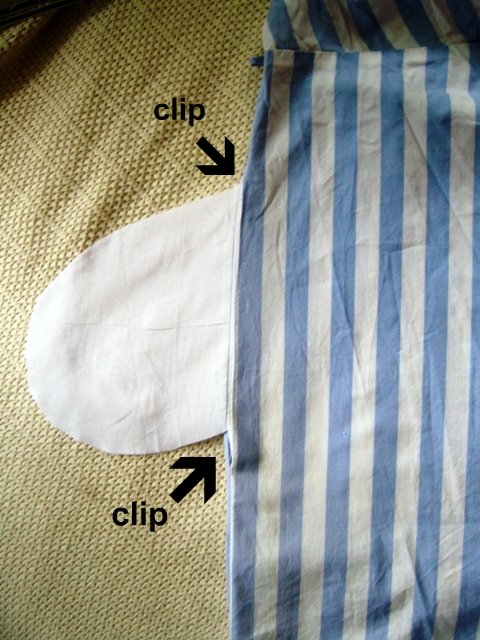
Step 8: Clip and snip
Clip into the seams where the pockets join the skirt. (This makes your seams lie flat without any bunching.)
Step 9: Finish things up
Press side seams open. Turn right side out.
Now, repeat steps 2-9 for the other side of the skirt.
Now fill them up with stuff!
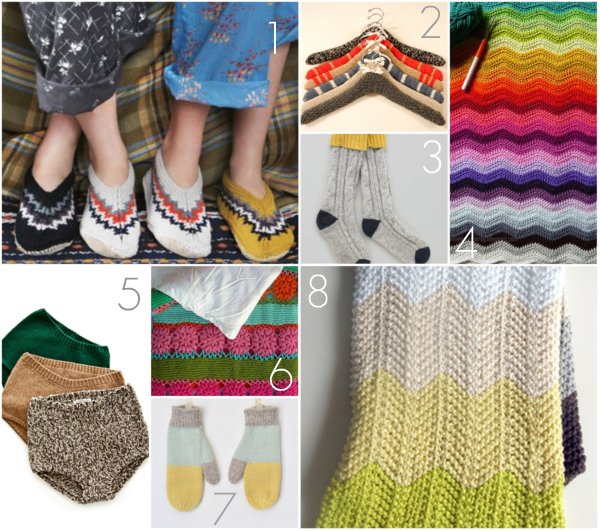
i've recently re-discovered my pinterest account. and realized there is so. much. good. stuff. on there. here are some of my very colorful knit favorites. most of these are courtesy of the very wonderful knitter and pinterest extraordinaire, meredith.
p.s. don't you love these collages? since picnik is closing down (tear), all premium services are free. meaning, you're going to be seeing a whole lot of fancy collages until the ants carry away the picnik.
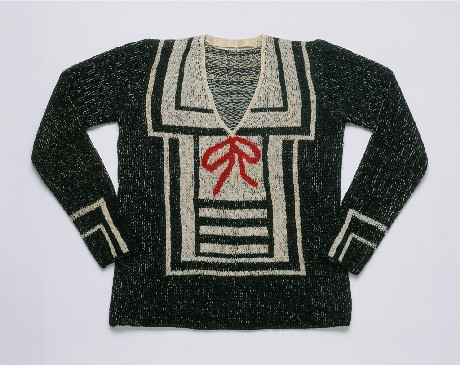
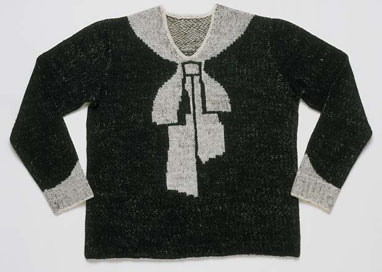
i discovered a few trompe l'oeil patterns and love them! trompe l'oeil is the 3D illusion created on a 2D surface. i think my favorite are these knit armenian bow sweaters (below)! they are adorable. although the hermes painted on cuffs and pockets (above) would be a much quicker and easier DIY to make a boring dress a bit more interesting.
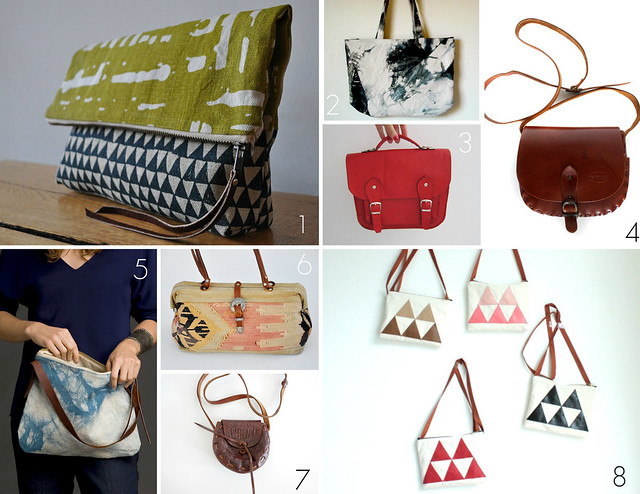
i've been etsy perusing. found lots of purses. since i've self-imposed a purse buying ban on myself, i thought i'd post here instead! for shopping, for inspiration. it's a bit of a mix between handmade and vintage, i love them all. i just wish my closet would hold more purses.
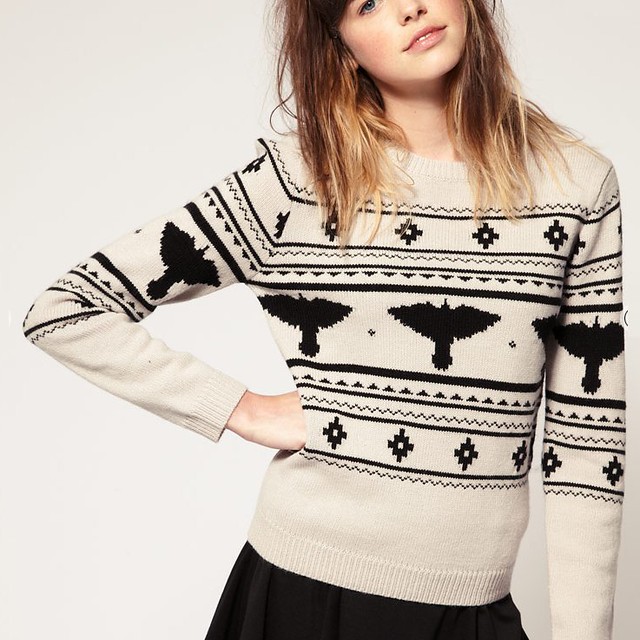
lately, there have been some pretty spectacular graphic sweaters popping up. the lovely prints, colors and textures would be perfect to add to a basic sweater pattern to perk things up a bit. i love the patterns of color, geometric designs, tribal prints, chevron zig zags and classic fisherman aran cables. here are a few of my favorites.

 arabella ramsey fall 2012


 Now you have a new ring! You can get pretty creative with these, and soon you'll be looking for anything with a flat surface to make rings out of. You can also make rings from geode stones with a flat back, vintage pendants, sliced agate, stone chunks like pyrite, or even little knit items like bows or hearts.


