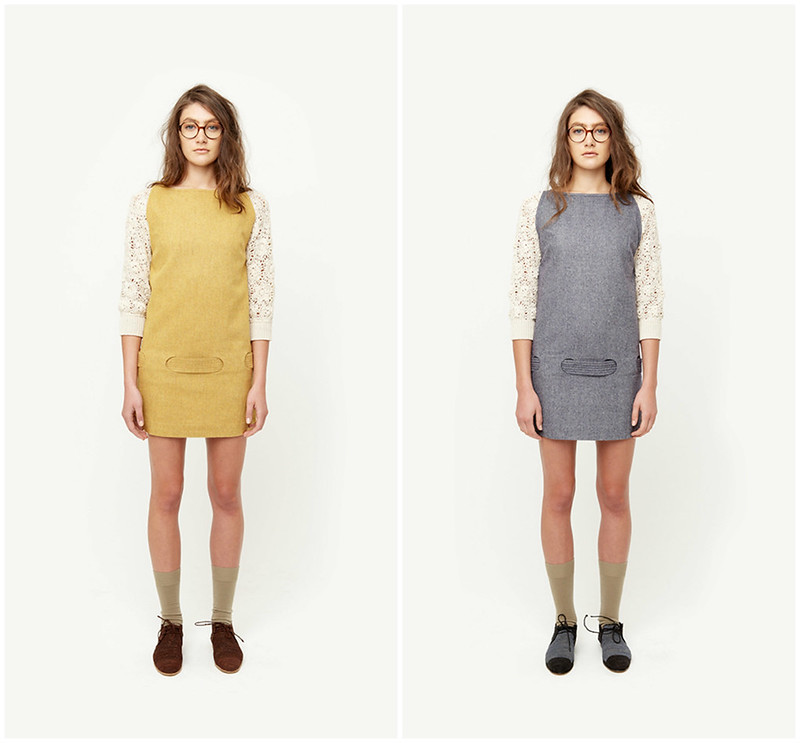
When I see things like this, it makes me want to rip my sleeves off and knit some new ones. Like I said yesterday, I love mixing media. I feel like tiny details like, 'oh yeah I sewed this dress, and knit the sleeves' make it EVEN BETTER than just handmaking something. Details are everything.
arabella ramsey fall 2012
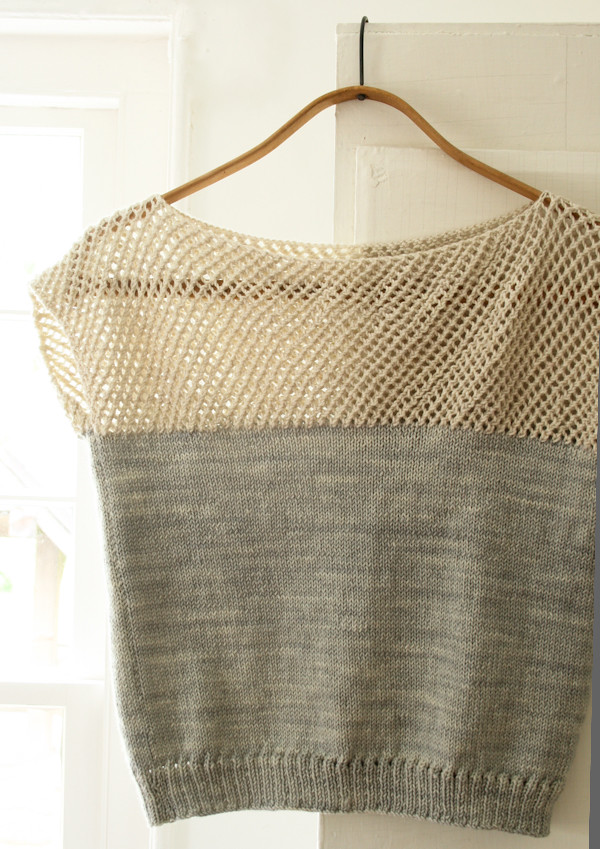
In addition to adding some fun elements to an existing garment, I also came across this cap sleeve lattice top knitting pattern. Again, from purl soho. I swear I don't work for them, I just love all of their stuff! I feel like it's rare to find fashionable knitting patterns, and this one is done so well!
I could seriously live in this thing in the summer. The pattern looks pretty great, but I think that I would modify it to be knit in the round, to eliminate the seaming. I could also see a version of this in 2 colorblocked colors as well, or half in neon. So many options!
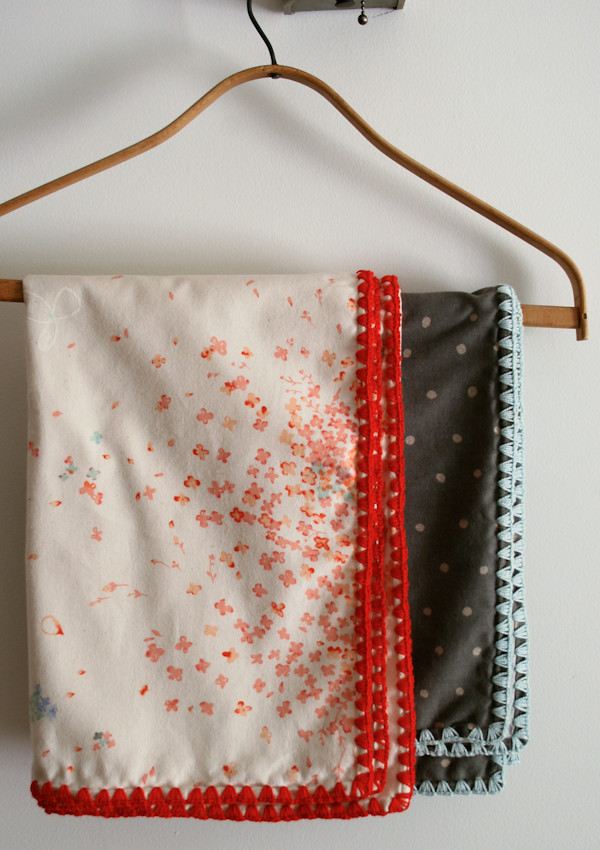
I stumbled across this baby blanket pattern over at Purl Soho. I love the mixing of sewing and crochet! And this would be super quick and easy to make as a baby gift. Purl has the detailed pattern, but basically you just have to hem the edges of the blanket then crochet the border around, using 3 single crochets and chain stitch.
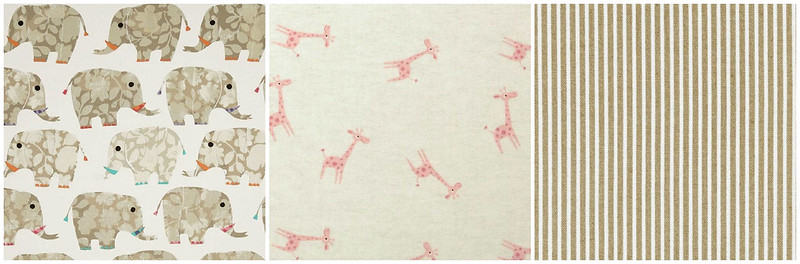
And while Purl recommends their fabric, which is fabulous, it's also pretty expensive. I researched some alternatives over at fabric.com and found some adorable flannel prints that would be perfect for a little baby. Here are some of my favorites. How adorable are those pink giraffes!! Ahh!
Edit: I just bought the giraffe fabric and will be picking up some yarn from purl next week. So excited to make this!
After finishing up this Amish Shadows Baby Quilt for my friend's new baby, I finally put together this basic pattern to cut out and make the squares used in this pattern.
Amish Shadows Quilt Pattern
You can download the Amish Shadows Quilt Pattern which includes pattern pieces for making the colored triangle. These pieces don't include the seam allowance though, so you'll need to add that in to all edges of all pieces before cutting your fabric. I typically use a 1/4" seam allowance for quilting.
You can use the pattern pieces to construct each square. For my blanket, since it was for a baby, I assembled 9 squares (each 10" square). Then I added 2 sets of borders around the edges.
To quilt the blanket, I stitched just inside of the lines for each triangle piece, then added a heart to the largest triangle section. The pattern also includes a template for the heart that you can trace onto your quilt.
Typically, I think Amish Shadows quilts are made with bright rainbow colors, and black as the base color, but it just seemed a little too dismal for a baby blanket.
Hopefully you'll enjoy the pattern and make your own baby quilt! Let me know how it goes if you do.
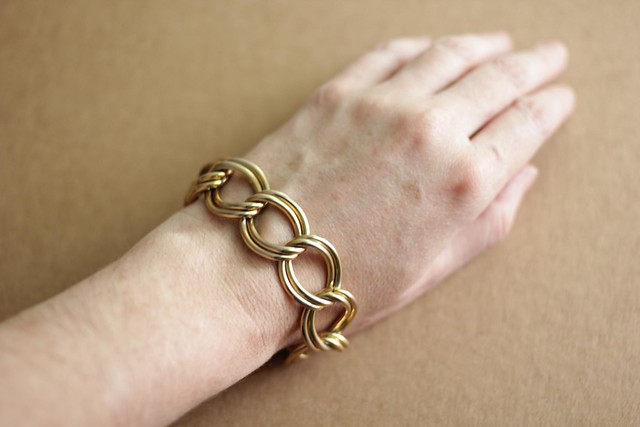
Here's a tutorial on how to make a basic chain bracelet, for your very own DIY bracelet arm party. I like the look of colors of the crazy circus arm, with friendship bracelets, chain bracelets, rhinestones and bangles, but sometimes it's nice to have just a simple, basic bracelet to throw on. The good thing is, this chain bracelet stands alone well, or can serve as a foundation to a crazy arm circus. And, the technique is simple, and you can apply it to any chain you find, so you can make all kinds of different styles.
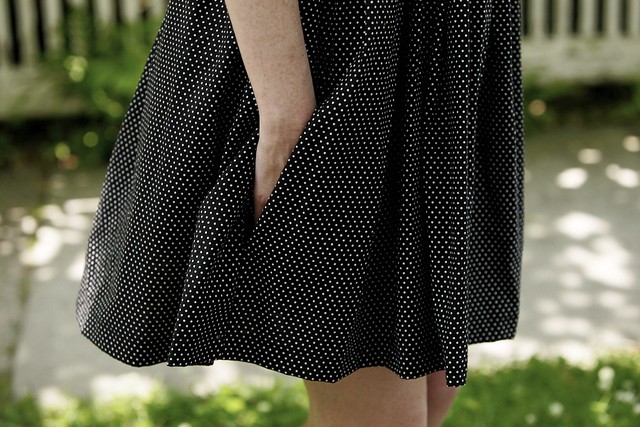
This sewing tutorial explains how to make a pocket, gives you a pocket pattern, and tells you how to add an in-seam pocket to any dress (or pants, or anything really), making it SO MUCH MORE USEFUL. Pockets are essential, otherwise, where are you going to hide your hands and uneaten snacks?
Keep reading for the pocket pattern/tutorial, or you can check out my other DIY patterns.
Step 1: Print out the pocket pattern (And start hoarding your snacks)
Download and print out the pocket pattern; cut out 4 pocket pieces. (the pattern stretches a little into the margins — sorry, i like big pockets!)
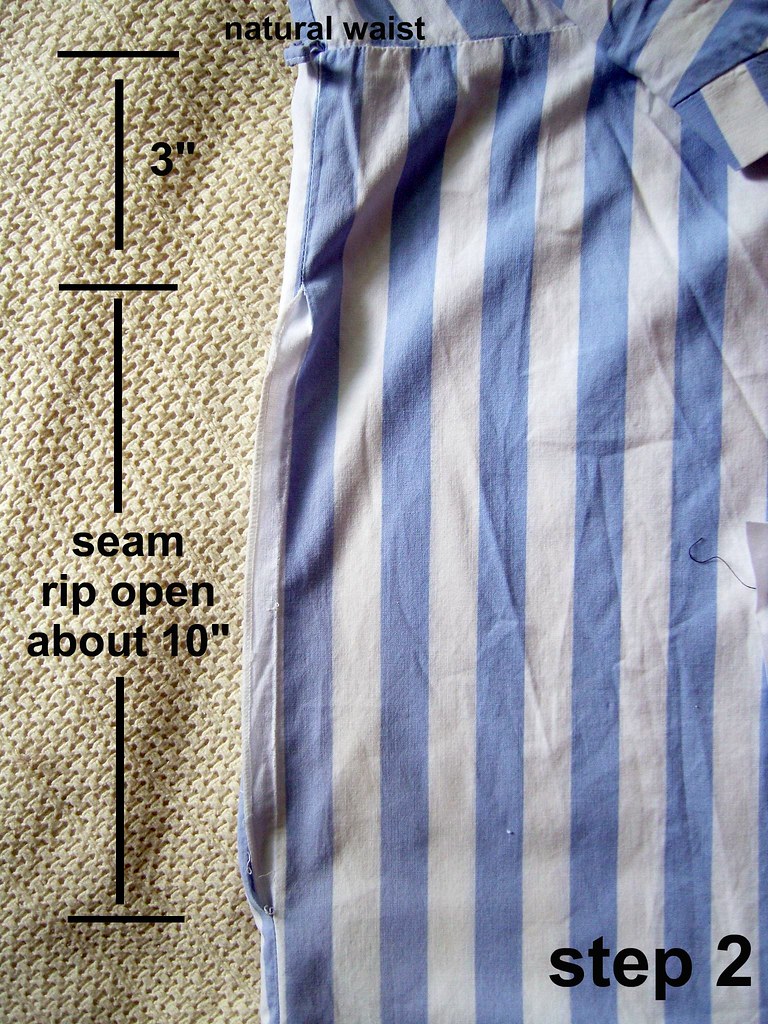
Step 2: Rip those Seams
Beginning about 3 inches below the natural waistline, start ripping the seam until you have a 10" hole. **Note, this is your natural waistline, which is much higher than where your pants waistline is. Your natural waistline is a few inches above your belly button.
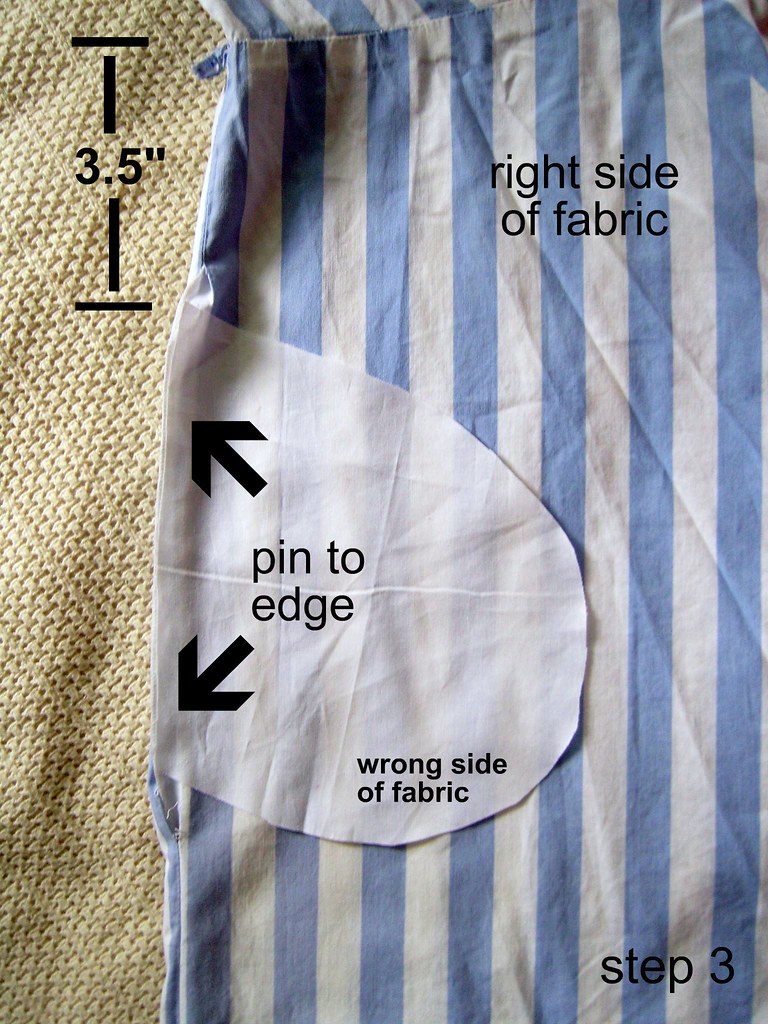
Step 3: Sew your Pockets
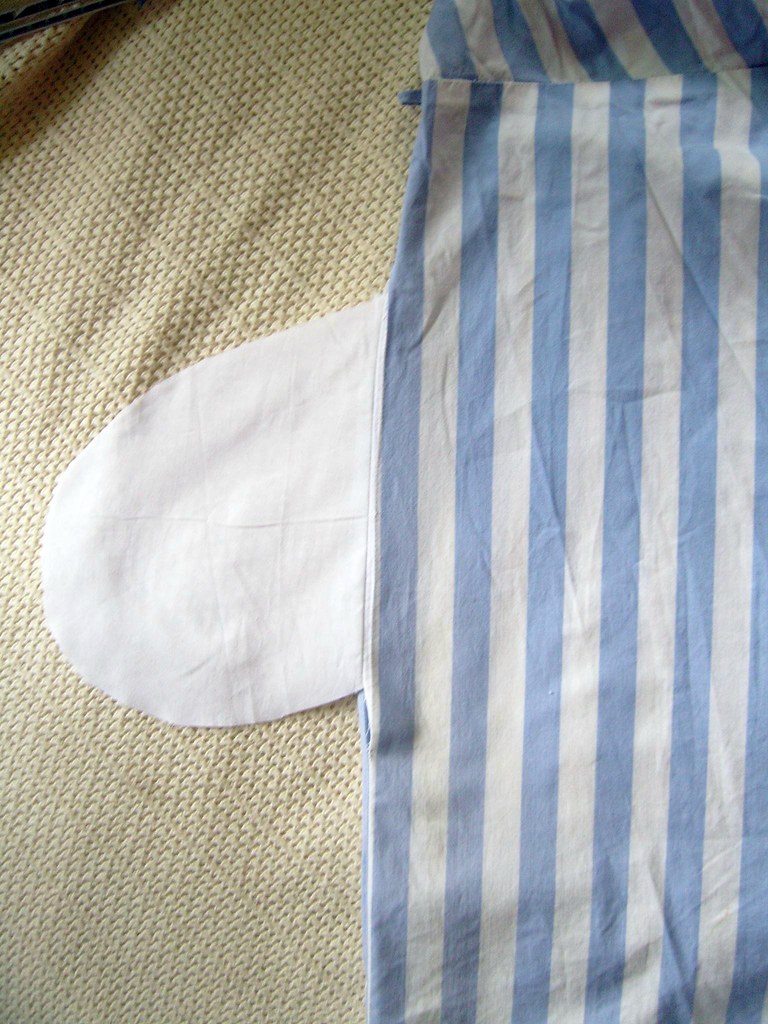
Place 1 pocket piece on the front of the skirt, right sides together, 3.5" below the natural waistline, lining up the edge of the pocket with the edge of your skirt. Pin in place. Now do the same thing on the back of the skirt, pin another pocket piece, in the same location (also, right sides together).
Step 4: Start Stitching
Stitch the front pocket to the front of the skirt, using 3/8” seam allowance. Stitch the back pocket to the back of the skirt the same way. (You are using a 3/8” seam allowance so that in the end, your pocket fabric actually starts a little inside the skirt seam allowance…making it invisible from the outside)
Step 5: Press
Press the seam open...
Step 6: Press again
...then fold over the pocket and press it flat.
Step 7: Stitch all the way around
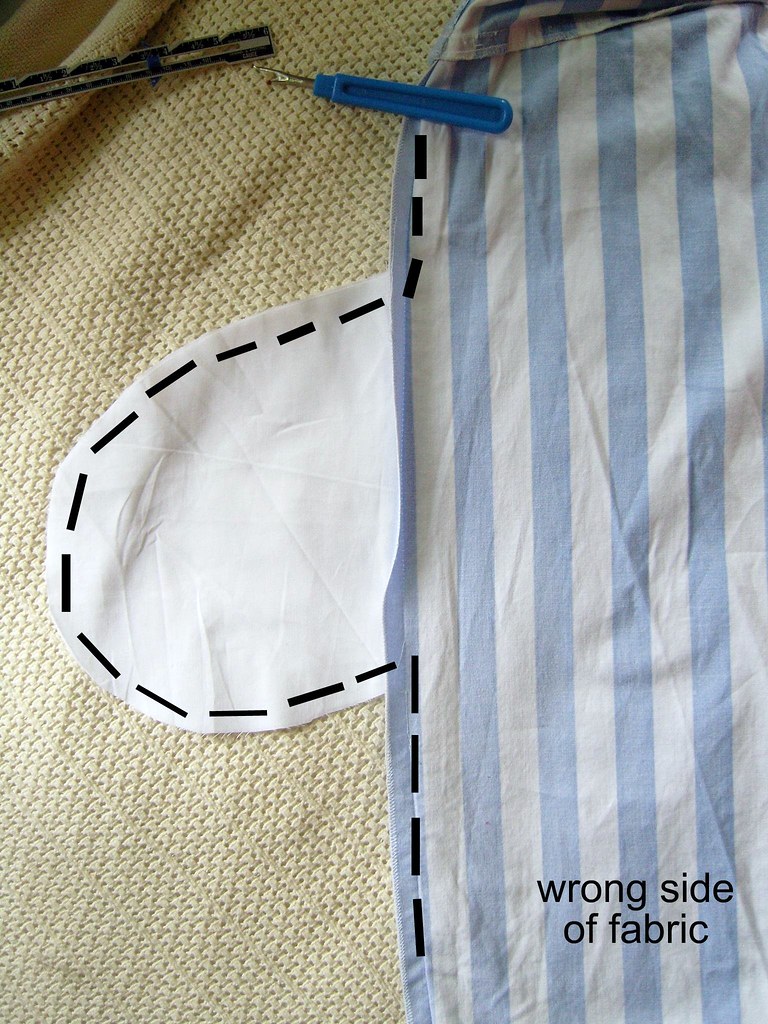
Turn your skirt inside out. With front and back skirt pieces right sides together, stitch along the seams and around the pockets using 5/8” seam allowance…in one continuous stitching line. Make sure your seam allowance matches the existing skirt seam allowance, and stitch over the existing side seams at the top and bottom just a bit to make sure everything is put back together nicely.
Step 8: Clip and snip
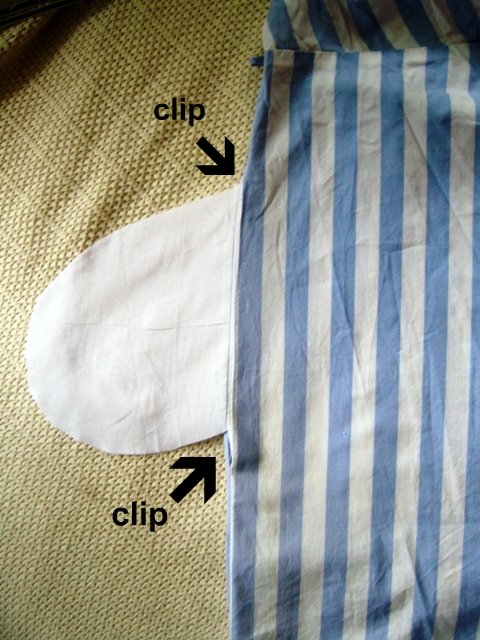
Clip into the seams where the pockets join the skirt. (This makes your seams lie flat without any bunching.)
Step 9: Finish things up
Press side seams open. Turn right side out.
Now, repeat steps 2-9 for the other side of the skirt.
Now fill them up with stuff!
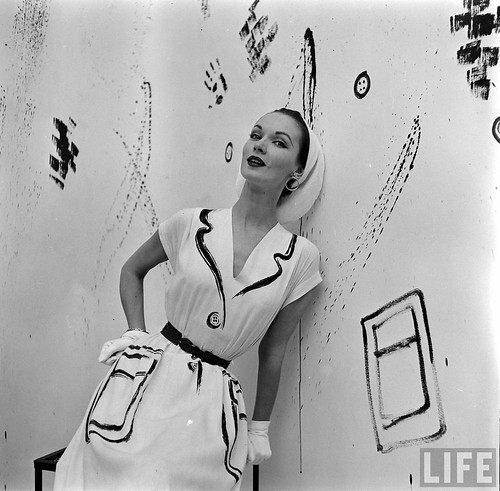
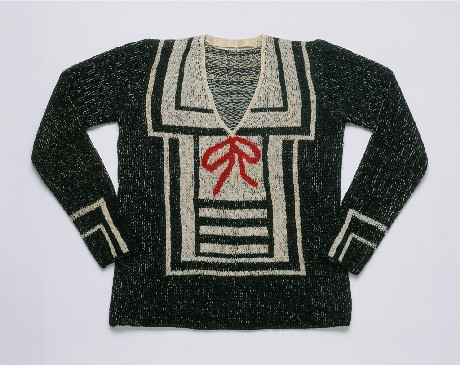
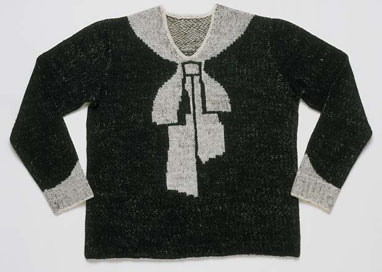
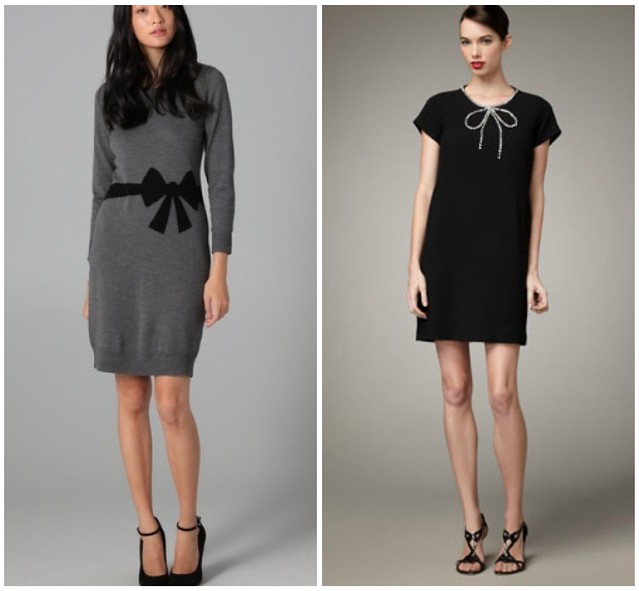
i discovered a few trompe l'oeil patterns and love them! trompe l'oeil is the 3D illusion created on a 2D surface. i think my favorite are these knit armenian bow sweaters (below)! they are adorable. although the hermes painted on cuffs and pockets (above) would be a much quicker and easier DIY to make a boring dress a bit more interesting.
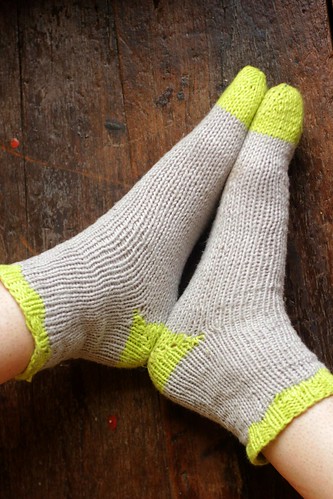
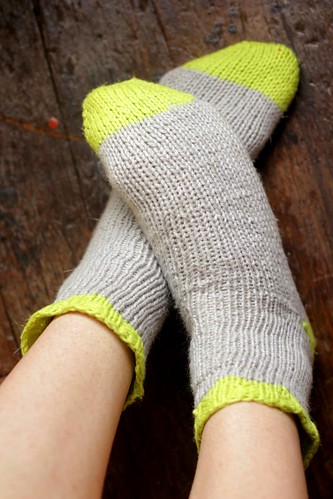
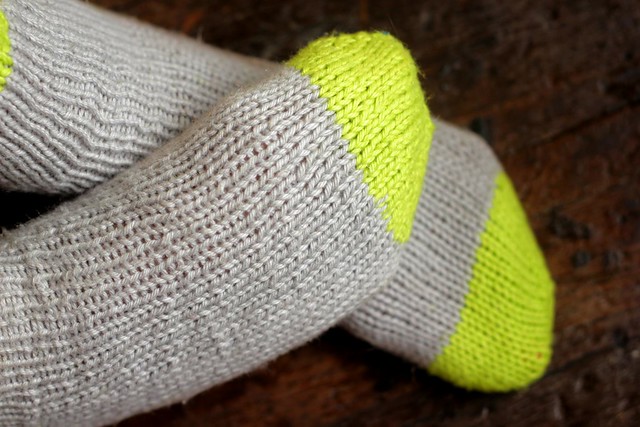
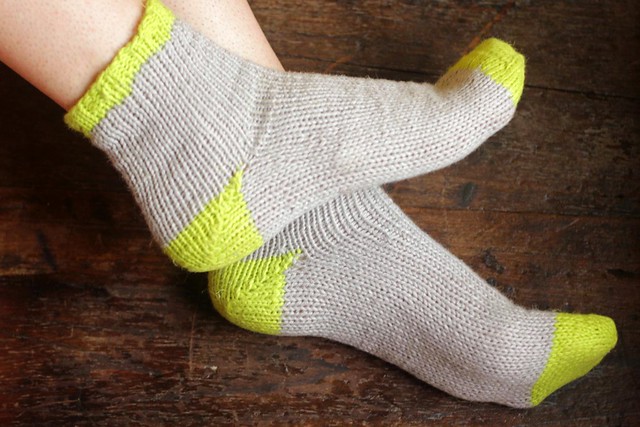
Below is a free knit sock pattern for a pair of my bright summer socks, worked in a lightweight cotton/linen yarn with a contrasting toe, heel and border around the cuff. i used a really bright contrast yarn to perk up the gray main color. the pattern is written toe-up so it's customizable to your foot.
Read on for the full summer sock knitting pattern, or you can check out my other patterns.
Summer Socks Pattern
Sizing
Pattern is adjustable. it's toe-up, so you knit until the sock fits your foot!
Materials
* 1 skein of knit picks cotlin yarn in whisker (main color - MC)
* 1 skein of knit picks cotlin yarn in chartreuse (contrast color - CC) -- you'll only use a small bit of this skein
* size US3 needles on long circular (or set of DPNs)
* (optional) elastic thread to weave in cuff
Gauge
3" = 15sts in stockinette stitch
Pattern
CAST ON/TOE
Using Contrast Color (CC), CO 8 sts each needle using the figure 8 cast on method, and work 1 round as part of cast on. (16 sts)
round 2 - k1, m1L, knit til 1 st left, m1R, k1, repeat for other needle
round 3 - knit
repeat rounds 2-3, 4 more times (36 sts)
tighten figure 8 loops. tightening from the opposite side of the tail, pulling loops, til you get to the tail side. pull tail to remove excess yarn.
continue in TOE color, knitting, for 3 more rounds
FOOT
switch to main color (MC), then keep knitting until 2" before desired length (length of foot).
increase round: K1, M1L, knit til 1 st left, M1R, k1...on next needle don't do any increases (38 sts - note: there will be 2 more sts on first needle)
note: your first needle is heel needle, second is instep.
HEEL
switch to CC - only working on first needle (heel needle)
this uses the "no fuss, no muss" heel
Sl first st (always purlwise), knit til 1 st remains, turn
Sl first st, purl til 1 st remains, turn
Sl first st, knit til 1 st more than previous section remains, turn
Sl first st, purl til 1 st more than previous section remains, turn
repeat last 2 rows until there are 8 sts left on your needle (not held), ending with a purl row
on next row (a knit row), sl first st, knit til 1 st left on middle section (last st before the huge gap), k2tog (closing the gap), M1L, turn
next row (purl row), sl first st, purl til 1 st left on middle section (last st before huge gap), p2tog (closing the gap), M1L (purl), turn
repeat last 2 rows til you've added all sts back on, ending with a purl row.
LEG
switch back to MC and knit 2 rounds.
decrease round: K1, ssk, knit until you have 3 stitches remaining on the needle, K2TOG, k1, change needles and knit all instep stitches, knit across second needle (36 sts)
Knit til leg is 3.25 inches from heel color change.
CUFF
still continuing in stockinette st, bring in contrast color into pattern. make sure to carry your yarn in the back VERY loosely (or else you won't be able to get these on your foot)
round 1: *mc mc cc cc mc mc, repeat from *
round 2: *mc cc cc cc cc mc, repeat from *
round 3: knit all sts in cc
round 4: repeat round 3
round 5: (begin the 2x2 rib) *k2, p2, repeat from *
rounds 6-7: repeat round 5
BO very, very, very loosely.
weave ends, block and weave elastic in cuff if necessary.
Abbreviations
CO = Cast On
St or Sts = Stitch or Stitches
MC = main color
CC = contrast color
M1L = make one left
M1R = make one right
SL = slip
SSK = slip, slip, knit in back of loops
K2TOG = knit two stitches together
BO = bind off
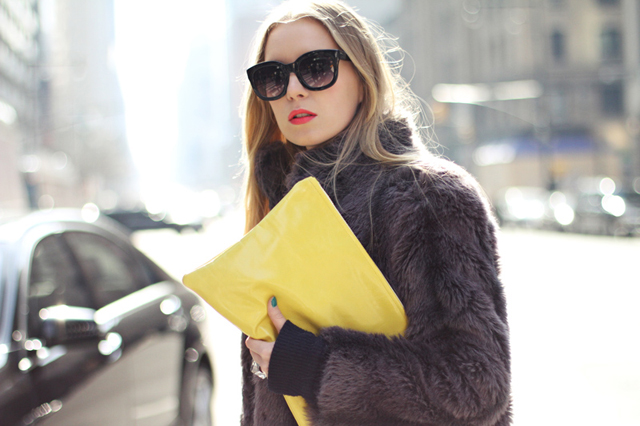
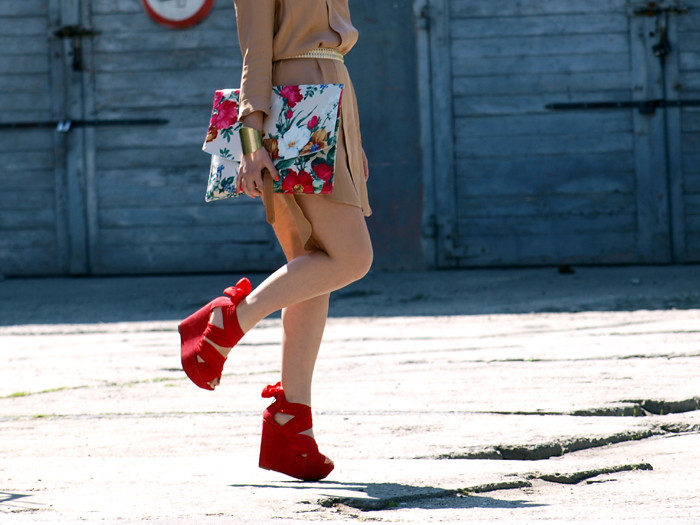
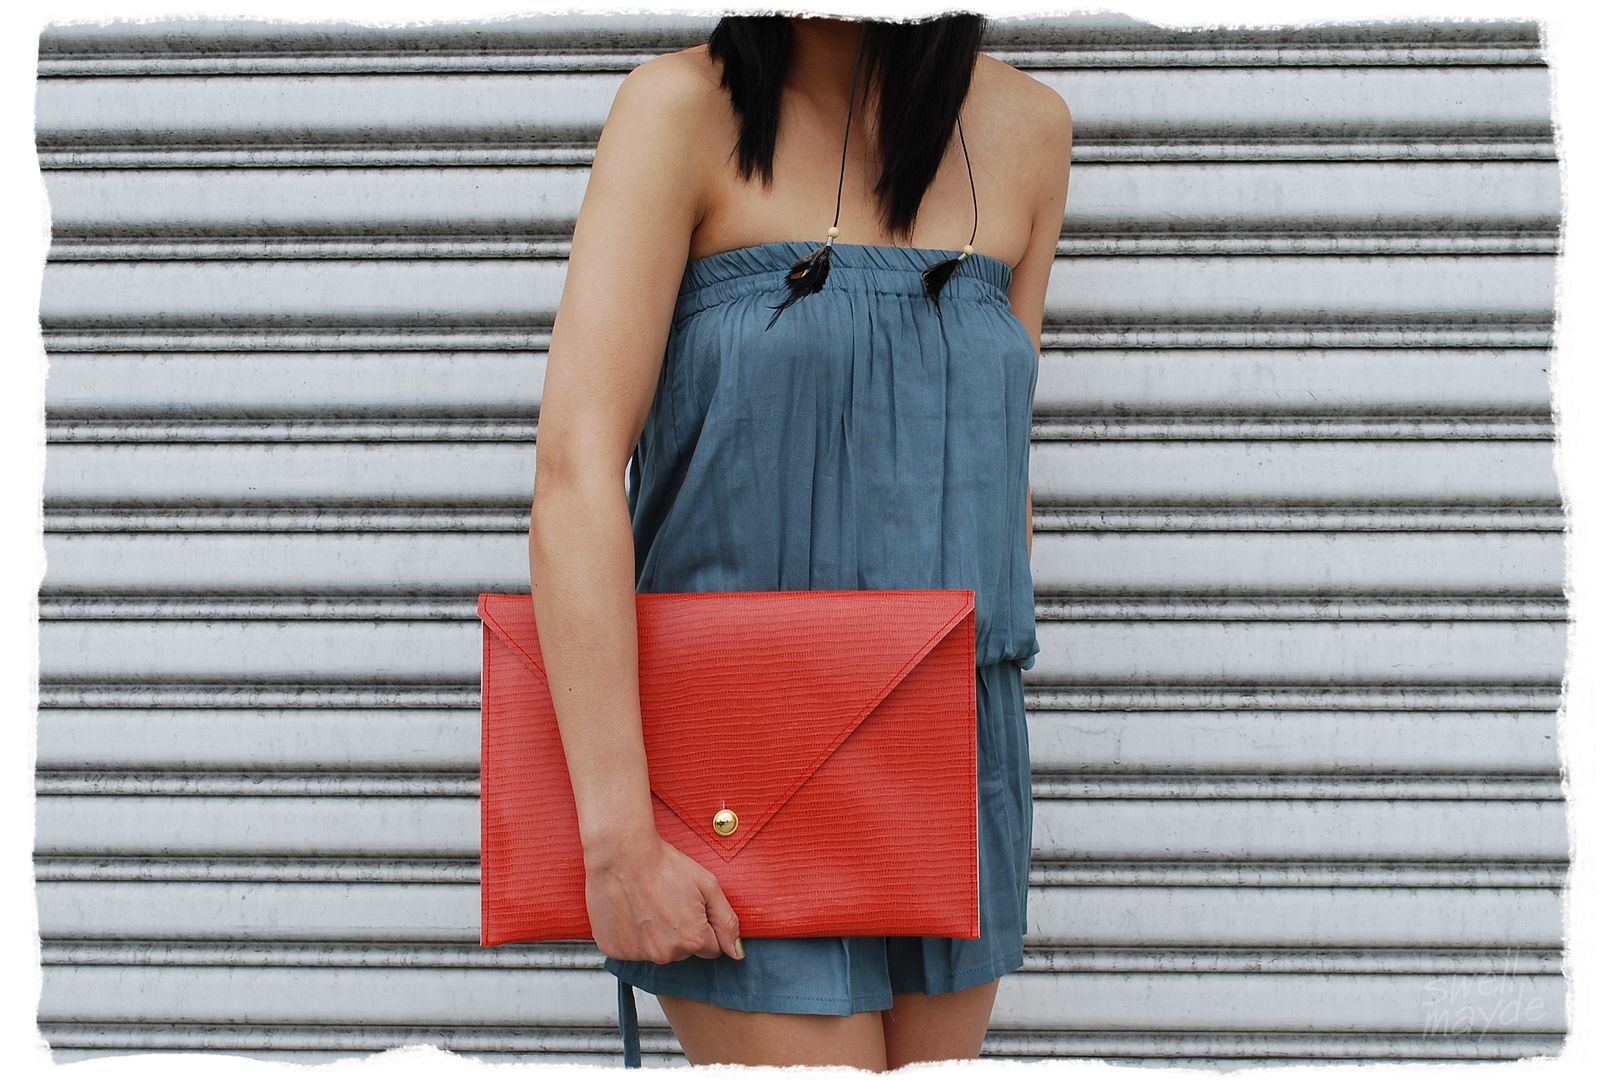
after carrying around a tote bag for nearly the last 6 years, i finally decided to try out a real purse over the past year. nearly broken of my tote habit (i do have 4 baggu's tucked away in all of purses...just in case), i'm starting to look around for neat purse ideas. for the spring, i love the big, bold oversized envelope clutches. i absolutely love them in bright summery colors, or bold graphic prints.
poking around the internet, i came across 2 tutorials! yay...hard work already done.
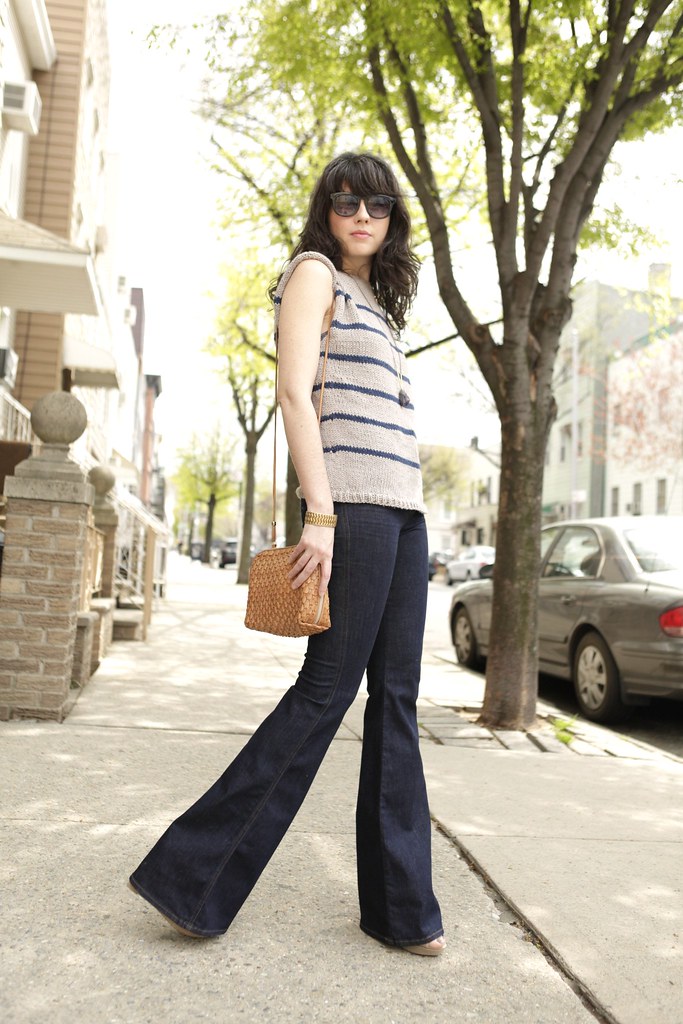
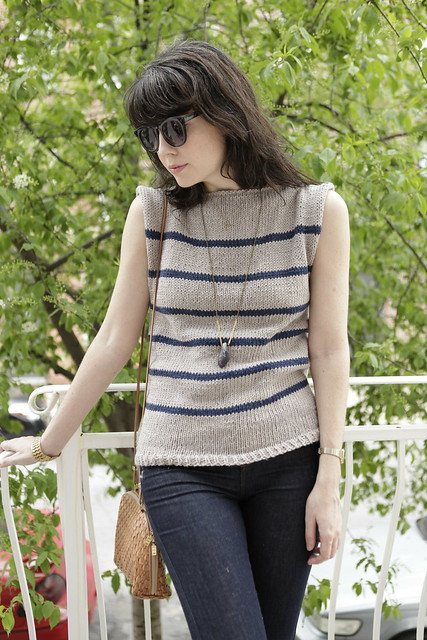
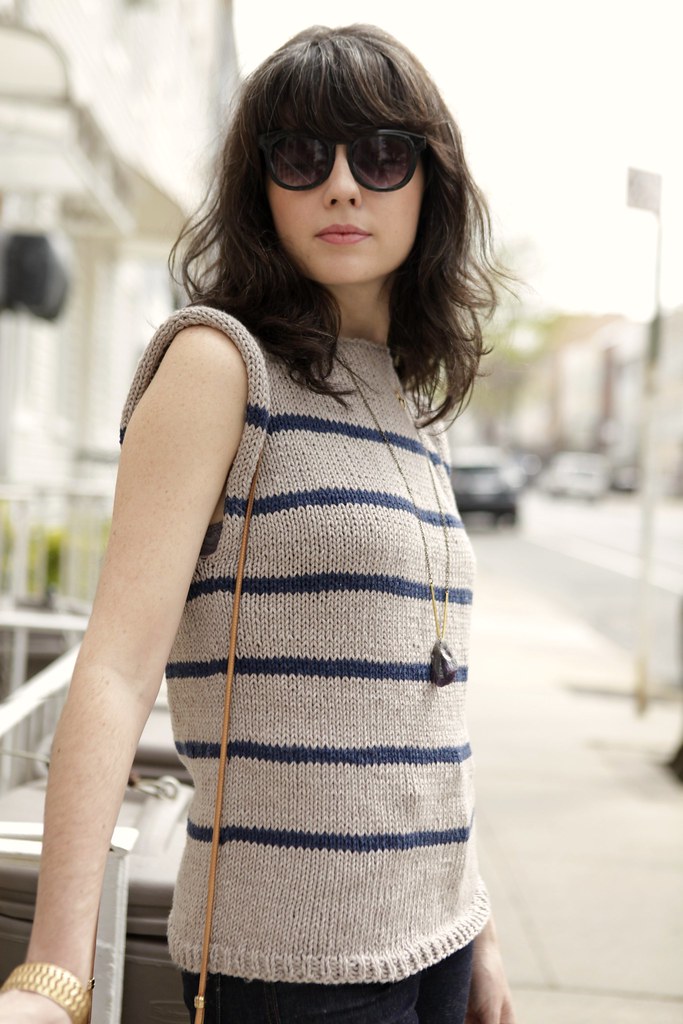
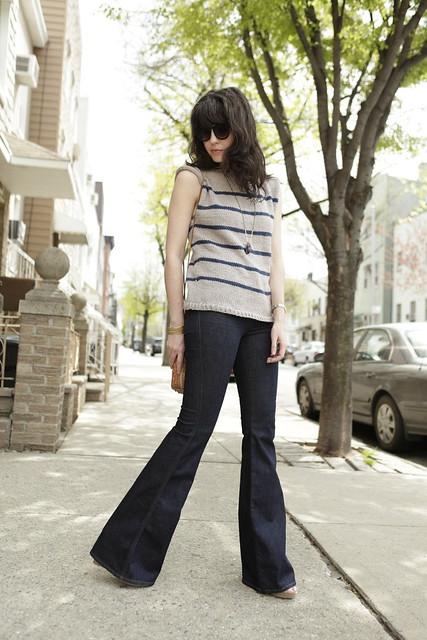
this is my free knit sweater pattern "Striped Breathless Sweater" which is an oversized, slouchy knit sweater, knit in the round from the bottom up, then worked flat across the shoulders. the best part...no seaming and no sewing at all! super quick to knit and the finished product is so adorable! i can see myself wearing this all summer long, and in the fall. sleeveless and made of cotton, it's made for warmer weather. also, see my other free knitting patterns and tutorials
Striped Sweater Pattern
Size
18.5" measured flat across the widest part of the shoulders
17.75" measured flat across the hips
Materials
Size 9 needles - 32” circular
Knit Picks Simply Cotton Worsted yarn in Camel Heather - 2.5 skeins (color A)
Knit Picks Simply Cotton Worsted yarn in Prussian Heather - 1 skein (color B)
2 stitch markers
scrap yarn or stitch holder
Gauge
Blocked Gauge: 4” = 13.67 sts, 22.5 rows
Unblocked Gauge: 4” = 15.67 sts, 20.83 rows
Stockinette Stitch
In the round:
Knit all stitches
Flat:
RS - knit row
WS - purl row
Notes
The sweater is knit from the bottom up in the round, until the bottom of the arm opening. Then the front and back are split, with the back stitches put on a stitch holder (or scrap yarn) while the front is worked flat. Then the back is worked flat. Then the shoulder seams are bound off together with a 3 needle bind off, leaving the center stitches bound off separately. No seaming necessary!
Stripes In general there are 12 rows of color A (tan) and 3 rows of color B (blue). However, at the top and bottom of the sweater, a set of blue stripes are skipped to give a wider chunk of color A (tan). So, when you cast on, you’ll actually knit 24 rows of color A before switching to color B. Then, continue in 12 color A to 3 color B pattern until you start nearing the top of the shoulder, where you’ll skip the last color B stripe.
Modifications This sweater can easily be modified to make it larger or smaller. All you need to do is change the number of stitches you cast on in the beginning, then follow the rest of the pattern as is. To determine how many stitches to cast on, you'll need to know how many total inches all the way around you want your sweater to be (i.e. 40 inches) and your gauge (i.e. 4" = 16sts). (Note: Your gauge can differ from mine if you're determining your own number of cast on stitches).
First, calculate your gauge per 1", by dividing your Number of Sts by Number of Inches. (i.e. 16/4 = 4 sts per 1")
Next, multiply your gauge per 1" (the number you just calculated) x your target sweater size (i.e. 4 x 40 = 160sts).
Last, If your number is an odd number, round to the nearest even number. (You want an even number of stitches so your back and front of the sweater are identical). That's it!
Techniques Used
increases - make 1 (left and right slanting). see knittinghelp.com for great instruction on increases
jogless stripes - stationary method of joining colors for jogless stripes. a great overview is at techknitting
Pattern
BOTTOM
CO 138 sts in color A, join to knit in the round, being careful not to twist stitches.
Place marker between first/last st (PM1) and between sts 69/70 (PM2)
Round 1-4 - *K1, P1, repeat from * across row
Round 5-76 - knit in stockinette st (add or decrease # of rounds here if you want to make it longer or shorter)
At the same time, switch colors for the stripes. The first 24 rows are worked in color A, then 3 rows of color B. Afterwards, work 12 rows in color A then 3 of color B.
Round 77 (round 5 of color A) - increase row: slip M, k1, m1R, knit to 1 st before next marker, m1L, k1, SM, k1, m1R, knit to 1 st before M, m1L, k1 (142 sts)
round 78 (round 6 of color A) - knit
Split front and back
Next row - (row 7 of color A) - knit from first to 2nd marker (this will be your front - 71 sts); place all sts from 2nd M to end of round on a stitch holder (this will be your sweater back - 71 sts).
FRONT
row 2 - purl row (keeping in stockinette st worked flat)
row 3 (row 9 of color A) - increase row - k1, m1R, knit to 1 st before last st, m1L, k1 (73 sts)
row 4 - purl
row 5 - knit
row 6 - purl
row 7 - (row 1 of color B) - increase row - k1, m1R, knit to 1 st before last st, m1L, k1 (75 sts)
row 8-46 - work in stockinette stitch flat
(This will be about 9 inches from the split in the underarm seam.)
This covers 2 more blue stripes, but skip the last set of blue stripes.
Put sts on holder
(Note - after the split, when switching colors, when switching back to color A, if you’re on a circular needle, slide your sts over to the other side of the needle so you don’t have to break your color A yarn…you can just carry it up…but just make sure you continue working in stockinette st). if this confuses you - just skip this trick and switch colors like normal :)
BACK
add sts of back from holder to needles, positioning needles to start with the KNIT row. setup row 1- knit this row.
follow instructions for FRONT.
SHOULDER & BIND OFF
Use 3 needle bind off for the first 19 sts to create a should seam. Bind off middle 38 sts in opposite of stockinette st. Bind off remaining 19 sts in 3 needle bind off for other shoulder seam.
Weave in loose ends and block sweater.
Abbreviations
CO = cast on
K = knit
P = purl
PM = place marker
M = marker
SM (or slip M) = slip marker (from your left needle to your right)
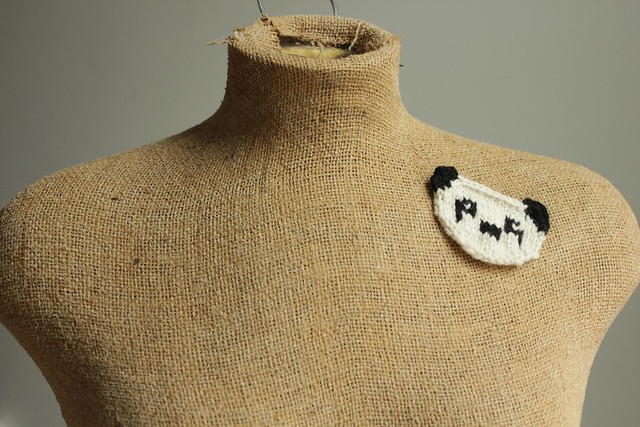
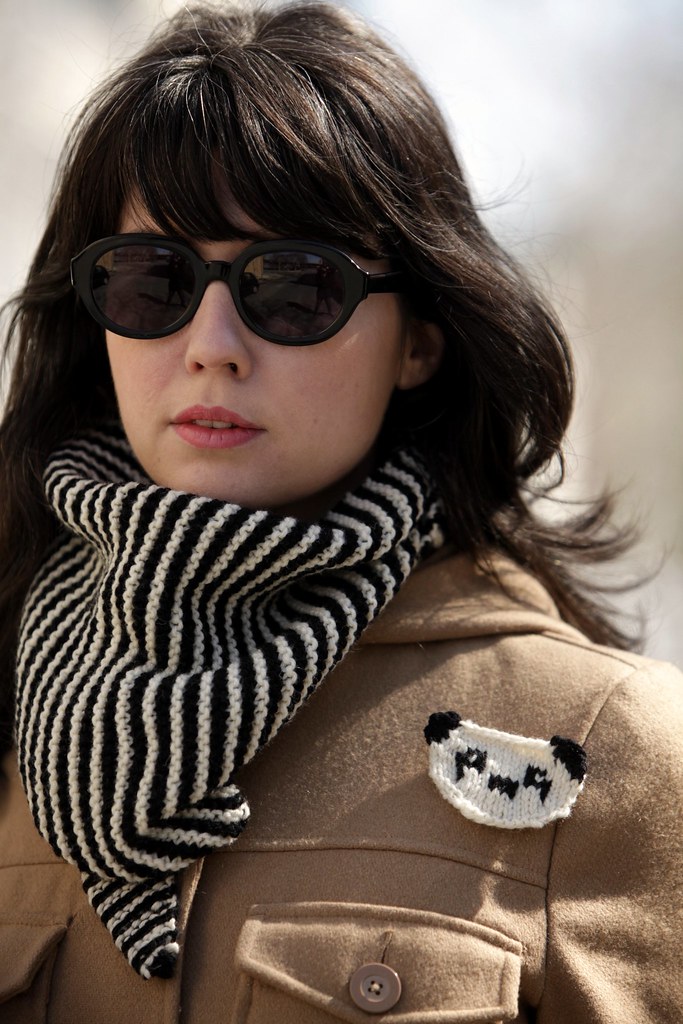
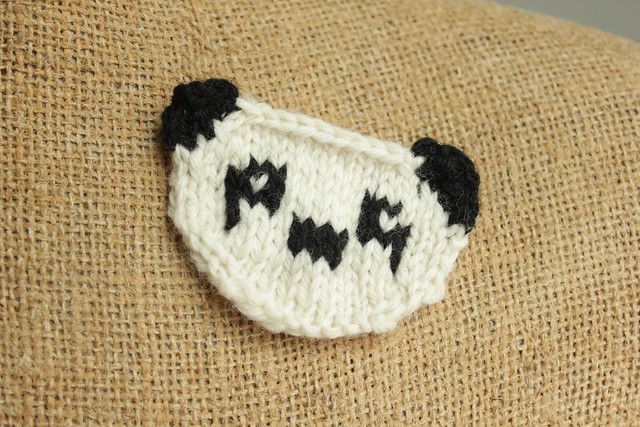
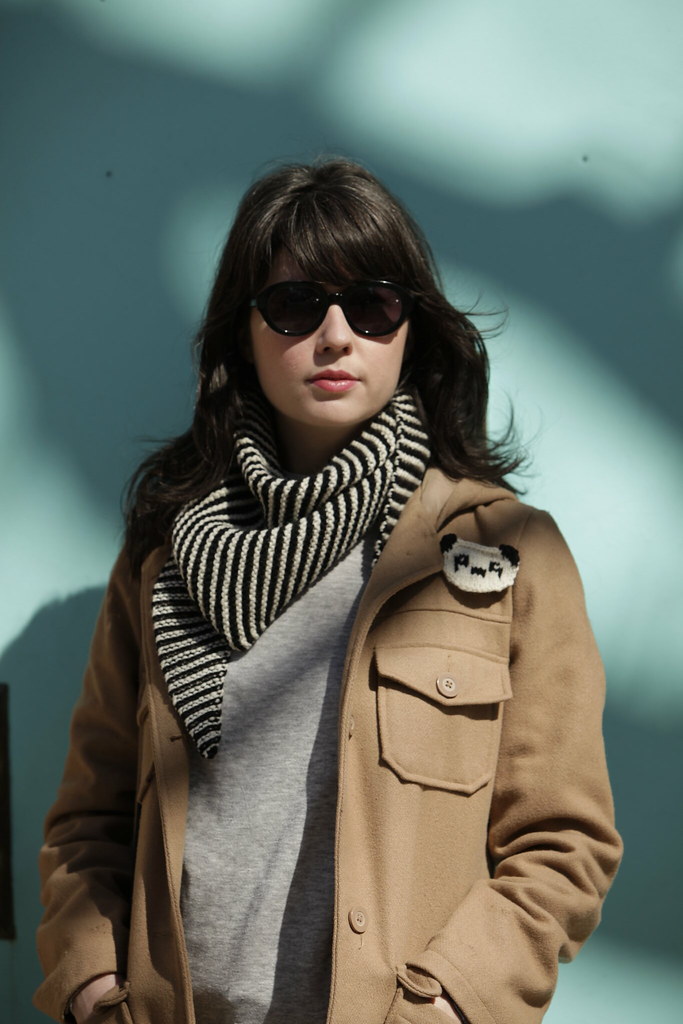
as promised, here's the pattern for the little knit panda. i used cascade 220 wool yarn in black and beige, because it was leftover from my scarf, and the colors hold up so well when wet-blocking (necessary to make the panda lie flat). it was knit up on size 6 needles.
all in all, it's a really quick knit, using a little bit of fair isle and a little bit of intarsia. nothing too complicated though and is perfect for using up little scraps of yarn.
also, happy april fool's day! when i visited my dentist earlier this week (which is literally like attending a comedy routine between my dental hygienist and receptionist), i asked the (somewhat nutty) receptionist if she had anything planned for the day. she said that in the past she tried to get all of the patients to eat oreos before they went in for their cleaning, but none of them would do it!
following an internet cookie trail, i came across this tutorial for a minimalist tote bag that i ADORE. my whole life is carried around in a tote bag every day and I'm constantly in search of one that's as pretty as it is functional. this one is perfect!! Designed by Rene Solkesz, you can find the full tote tutorial over at Design*Sponge. AND, it looks like Rene has a wonderful blog full of inspirational sewing ideas.

 arabella ramsey fall 2012