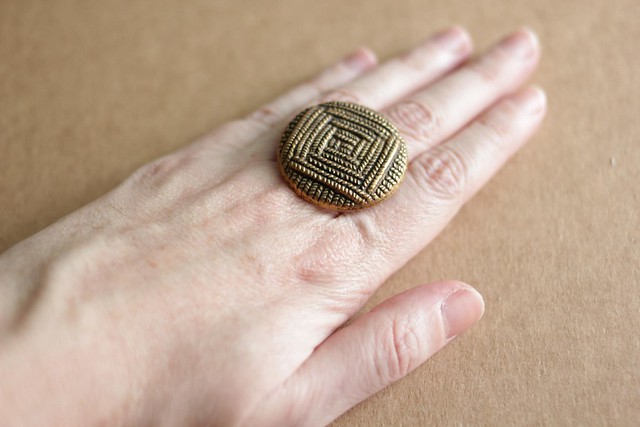
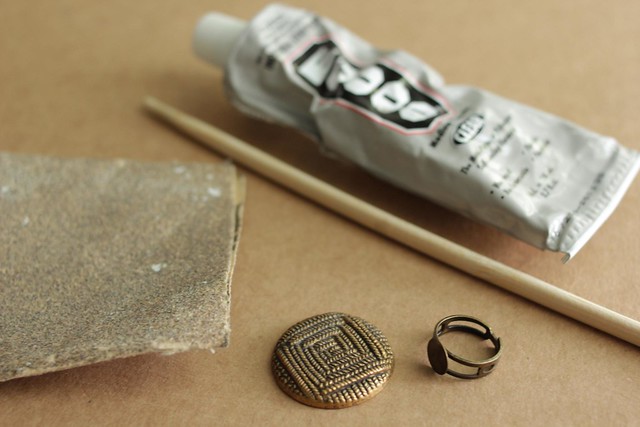
This is a tutorial to show you how to make a ring out of a vintage button. I see so many great vintage buttons, either randomly at a yard sale or thrift store or a part of an old sweater or shirt that I don't want to wear anymore. Buttons are little treasures that are great because they can be so fun, with a lot of detail. There's a bunch of stuff you can do with them, and I'm sort of button hoarder. If there's a nice set of them, I like to replace boring buttons on a shirt with fun colored ones. And below, is how to turn a button into a pretty ring.
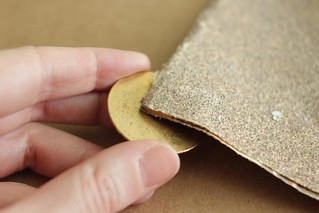
Using the sandpaper, gently sand the back of the button, and the flat surface of the ring blank. The flat smooth surface of the button/ring blank doesn't give the glue enough to really bond to, so by roughening up the texture a bit it will make your glue hold better. Make sure you don't go crazy here, and try to only sand the button where the ring blank will attach.
Step 2
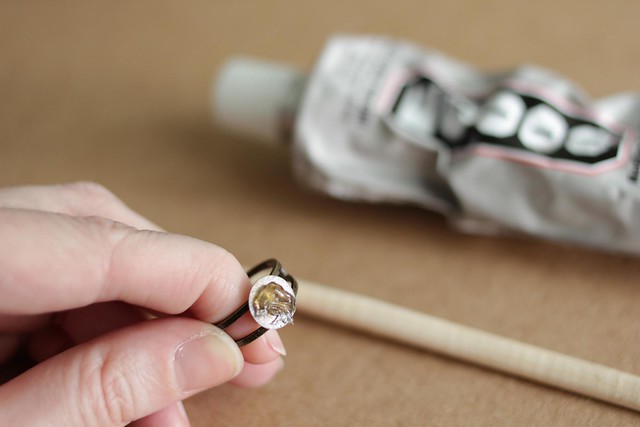
Apply a small dollop of glue with your chopstick to your ring blank. The key here is not getting too much. You want enough so that when you press the ring on it forms a solid layer, almost forming a suction, and only the tiniest bit peeks out the edges, but not so much that you have to wipe it off.
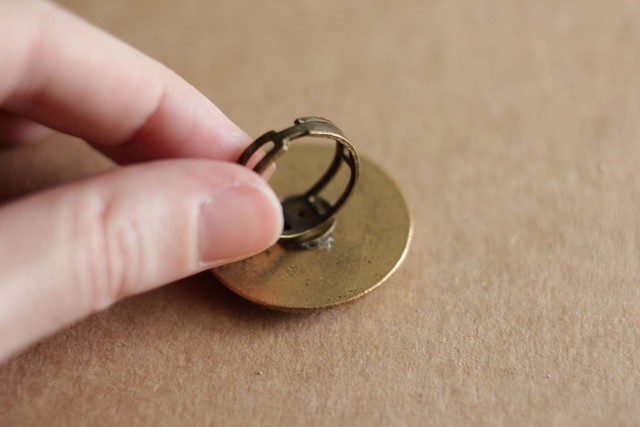
Step 3
Now press on your ring gently just enough that the glue spreads evenly across and you have a nice layer of glue in between. Don't press too hard where you squeeze all of the glue out of the sides. Now, set it aside and let it dry for a good 24 hours before you wear it.
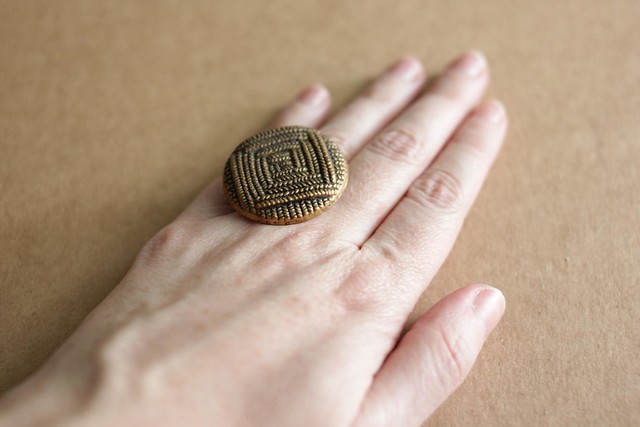
Now you have a new ring! You can get pretty creative with these, and soon you'll be looking for anything with a flat surface to make rings out of. You can also make rings from geode stones with a flat back, vintage pendants, sliced agate, stone chunks like pyrite, or even little knit items like bows or hearts.
Recently, I started a Jewel of the Month Club, where I'll select one item from the jewelry shop which will be on super duper sale for the month. It lets everyone get in on the jewelry fun, and you can build up your jewelry collection, one piece at a time. This month, the arrow earrings are now listed at over 40% off.
It's free, and no registration required...but if you want a little reminder every month to see what the new jewel will be, sign up below with your email address.
And...now that April is almost here, which would you want see as the next jewel of the month?
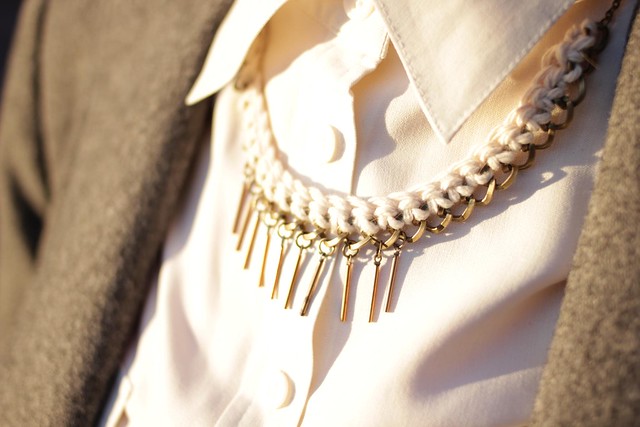
Happy Monday! It was a beautiful weekend, and I tried to spend as much time outside, and stay on the periphery of st. patrick's day madness. I spent some time lounging in the park, and having delicious dinner and cocktails with friends. And finally made some time to photograph me wearing my latest rope necklace.
This one is a little bit of yarn, crocheted to a chain with vintage brass fringe. I love the way it looks worn under a buttoned up collar. I think many of the times when I leave the house in the morning, I look a bit school marmish.
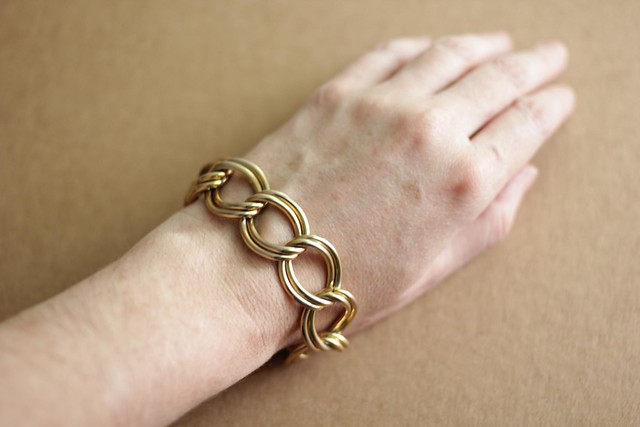
Here's a tutorial on how to make a basic chain bracelet, for your very own DIY bracelet arm party. I like the look of colors of the crazy circus arm, with friendship bracelets, chain bracelets, rhinestones and bangles, but sometimes it's nice to have just a simple, basic bracelet to throw on. The good thing is, this chain bracelet stands alone well, or can serve as a foundation to a crazy arm circus. And, the technique is simple, and you can apply it to any chain you find, so you can make all kinds of different styles.
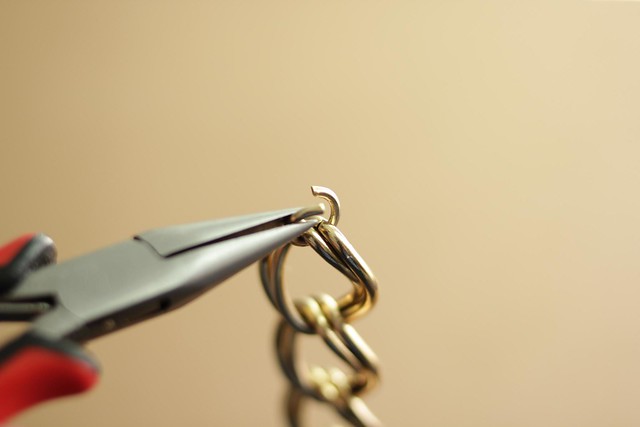
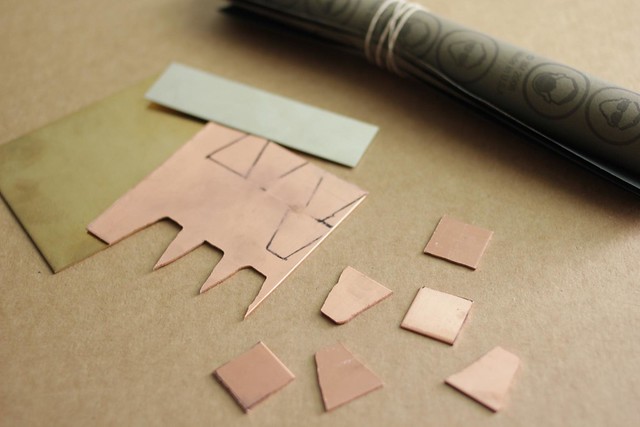
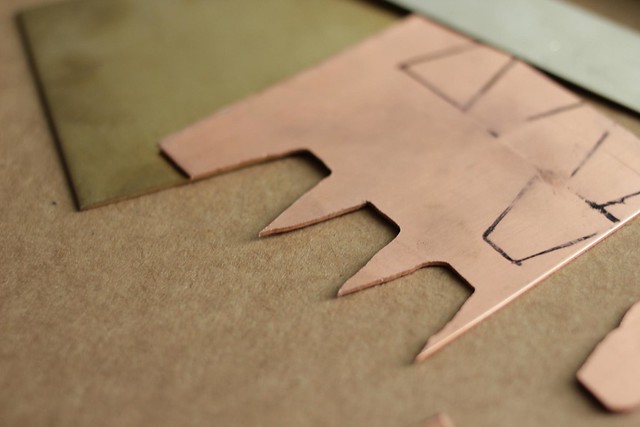
This weekend, I went to the first of four silversmithing classes at 3rd Ward in my neighborhood. It was pretty spectacular, and in just the first class we learned how to layout our designs, make a paper model, cut sheet metal, and watched our teacher solder some stuff with a torch hooked up to some really scary tanks. Next week, we're going to get to solder ourselves!
Here's my progress so far. It helped going into the class with some drawings of what I wanted to make, and even making a rough paper model beforehand. Basically, I'm going to make little half pyramids with all of these shapes. It's really hard work! We hand sawed each of these down. I got a bit faster over time, but each one took about 10-15 minutes. So much for my grand plans of hand-cutting all of my own jewelry materials. But, the good thing is, a lot of the materials to cut sheet metal (handsaw, files, anvil) are all pretty small, and would even fit in my tiny brooklyn apartment.
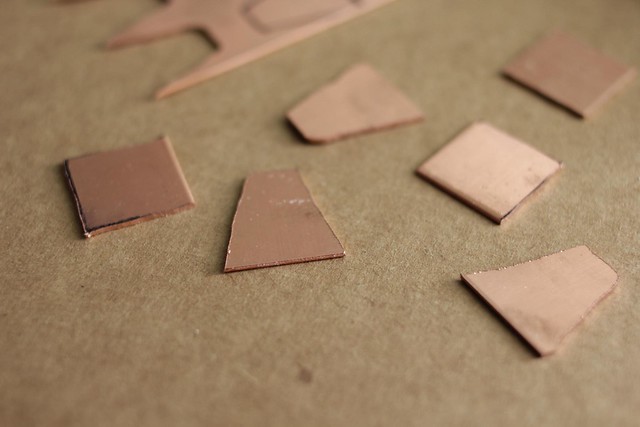
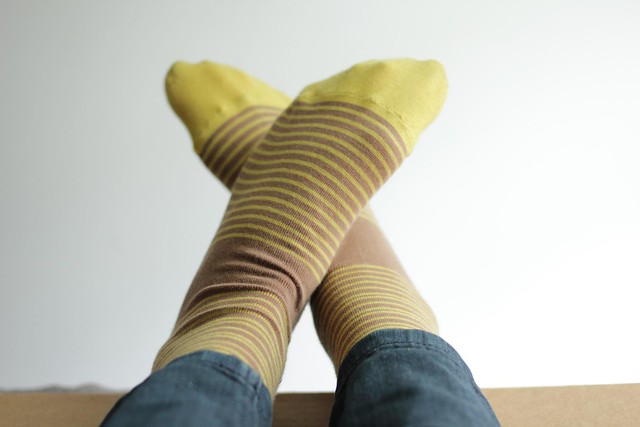
Things are looking pretty rough, but hopefully they'll start shaping up next week when we file, sand, and solder. I'll let you know how it goes! Also....my new Hansel From Basel socks came. Love!
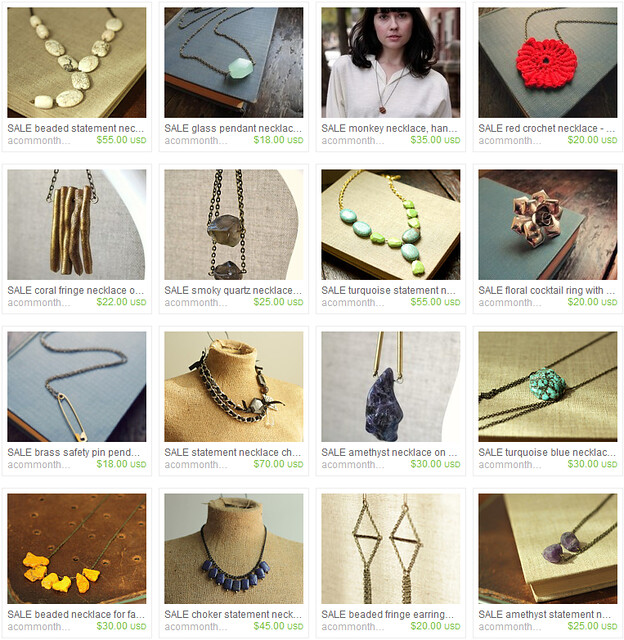
Hey guys, I've got a bunch of new jewelry for spring coming soon, and I need to clear out a bunch of stuff from the shop. Which is good news for you, because there's three ways to save (yay!).
a few weeks ago, I met up with neighboring Brooklyn-based stylist, Sarah, to chat necklaces and eat pie. my little necklaces were prettied up, packaged away, and sent out to have fun on a photoshoot. and here's the result of their hard days work, featuring the arrow necklace and pyrite necklace....
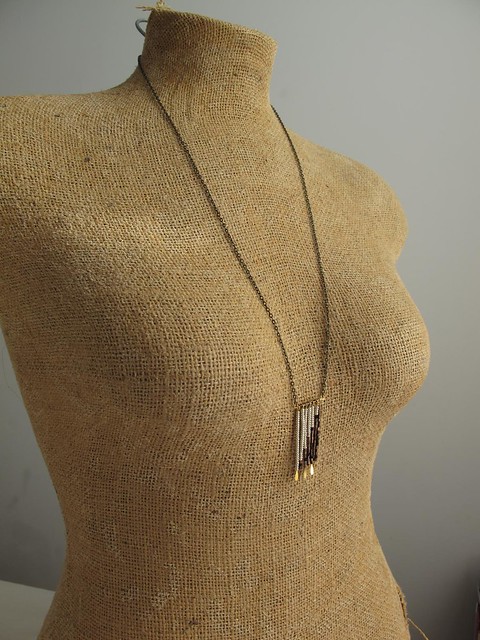
this DIY necklace tutorial tells you how to make a necklace with beaded fringe. it's super easy, and you only need a few supplies, which you can pick up at your local craft store, like Michael's.
every year, I try to make almost all of my holiday gifts, or give something handmade by others. handmaking gifts means you have to get an early start, so i'm starting a handmade gift series, featuring some easy tutorials for things you can make yourself to have your gifts ready by the christmas season.
for the first post in the series, i'm making a geometric beaded fringe necklace, perfect for women. read below for the full tutorial, or pick a beaded necklace up from the shop, if making one is not your thing.
Materials:
to start, you’re going to need the following. you can pick everything up at your local craft store, like michaels.
* round nose pliers
* wire cutters
* chain - cut to 28” long (or your preferred length)
* beads — probably 2 colors. or lots. go crazy.
* head pins (little wires with a flat end)
* eye pins (little wires with a loop at the end)
Tutorial:
next, sketch out your design, based on how many beads you can fit onto each head pin. here’s one i did with a simple geometric colorblock triangle design, with 18 beads fitting on each headpin — a total of 7 pins.
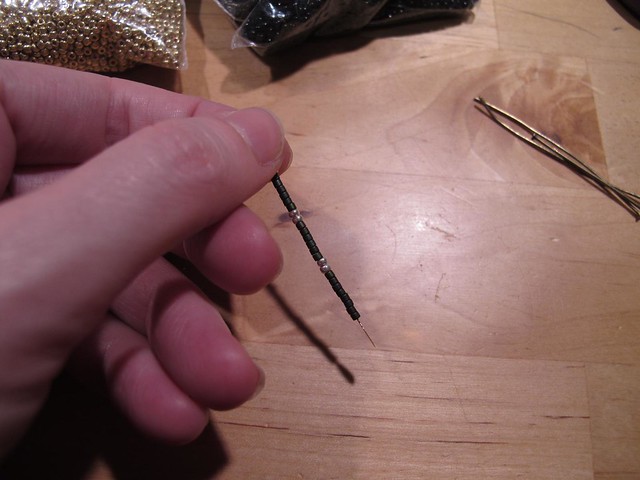
next, start adding beads to your head pins.
then, after your beads are on, take your round nose pliers, bend the top of the headpin to a 90 degree angle. (beads aren’t in the photo here, but they would be in your project.)
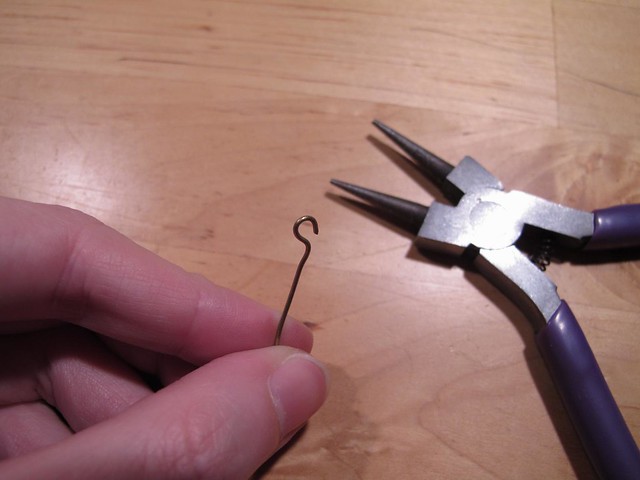
next, take your round nose pliers, grab the tip of the end of the head pin and rotate in the opposite direction of the bend, forming a loop.
then close the loop all the way so it fits snugly against the base (you don't want it slipping off of your necklace!)
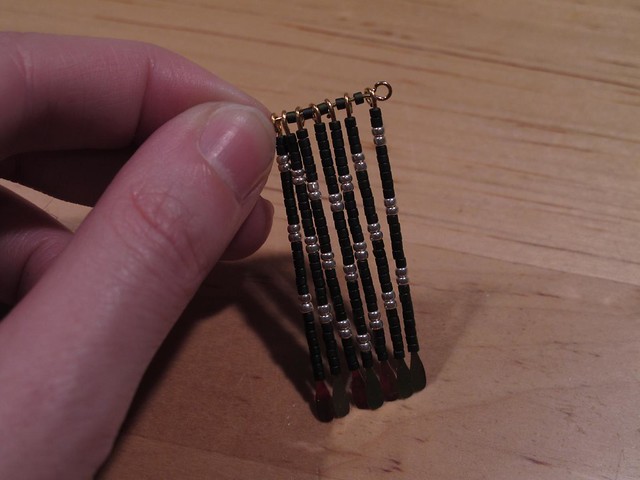
once you finish adding all of your beads, you’ll have a bunch of beaded sticks. now, take an eye pin (the one with a loop on one end already) and start threading them through (horizontally) each of your beaded sticks (vertical ones). make sure to put a bead on the eye pin in between each beaded stick that you have, so that they are space apart appropriately.
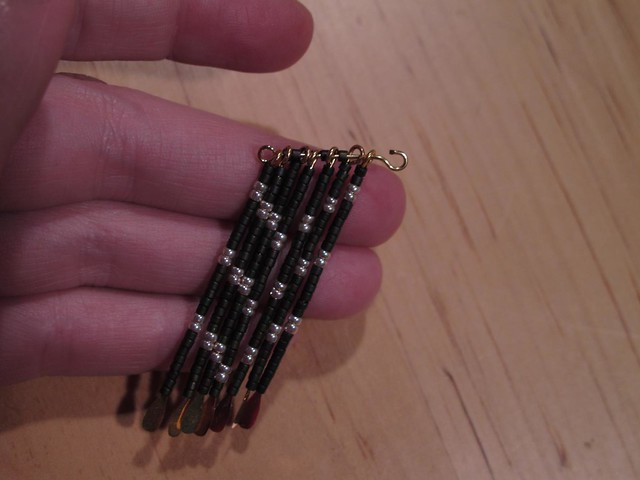
now, make a loop at the end of your eye pin, just like you did for the head pins — so that you have a loop at each end of the horizontal pin. now, thread your chain onto each of those loops at either end of the horizontal pin. close the loops tight so the chain doesn’t come off.
that's all! layer it on with other necklaces or wear it all by itself.
check back next week for the next gift guide tutorial.
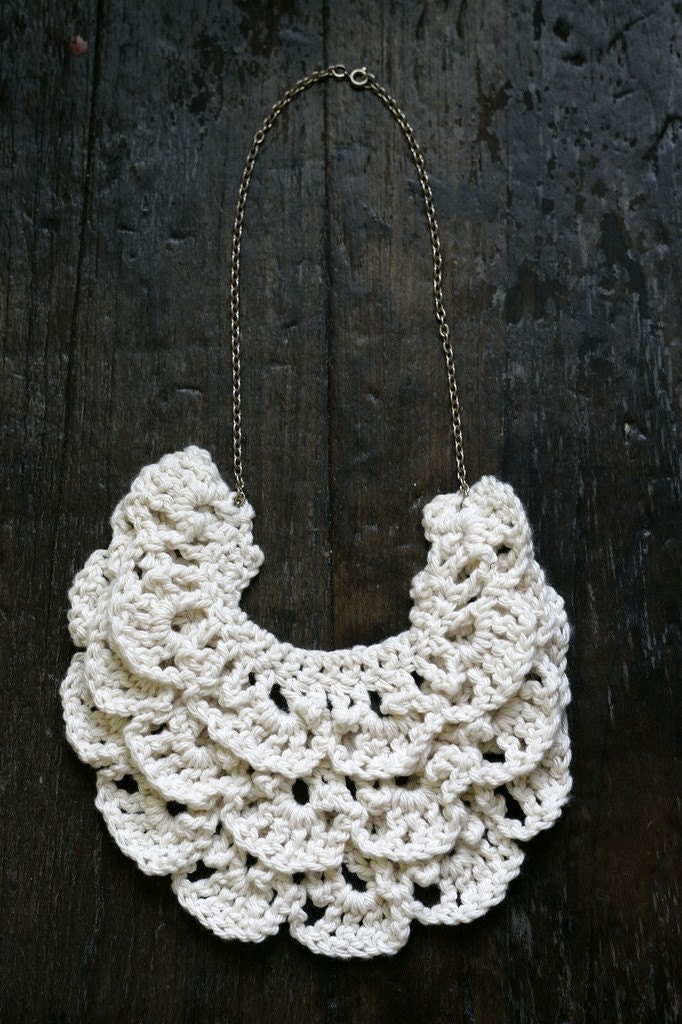
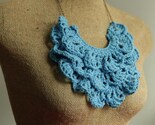
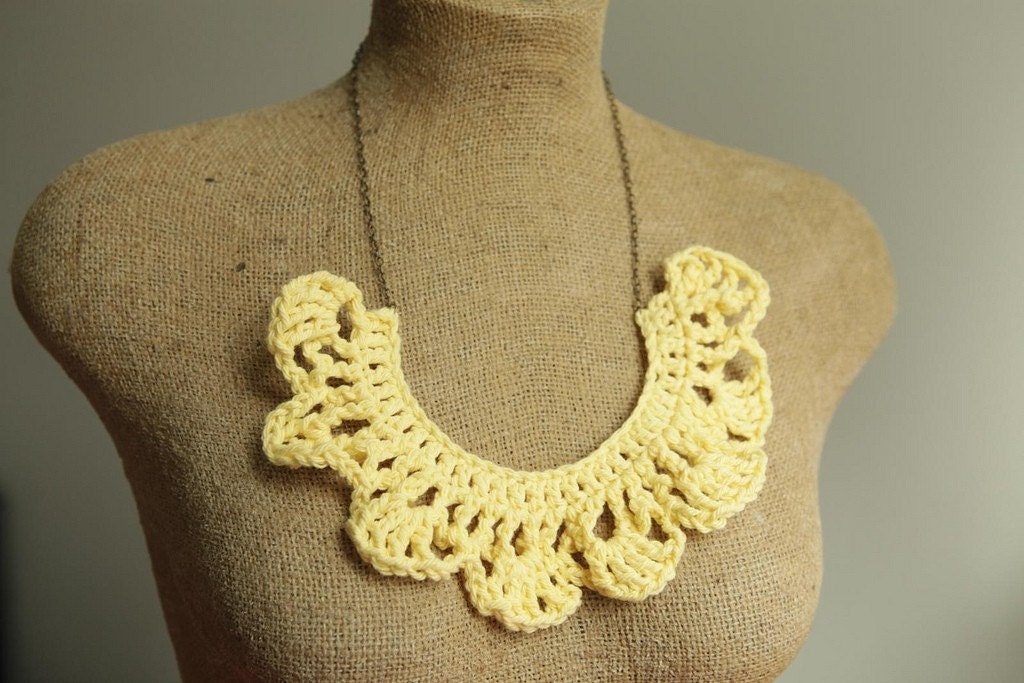
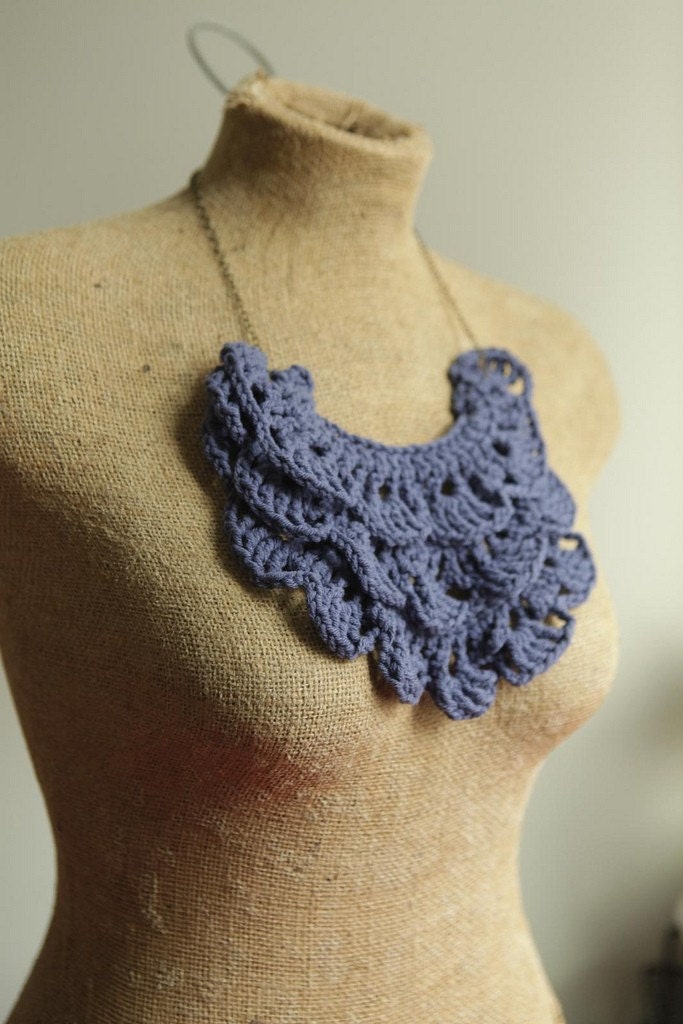
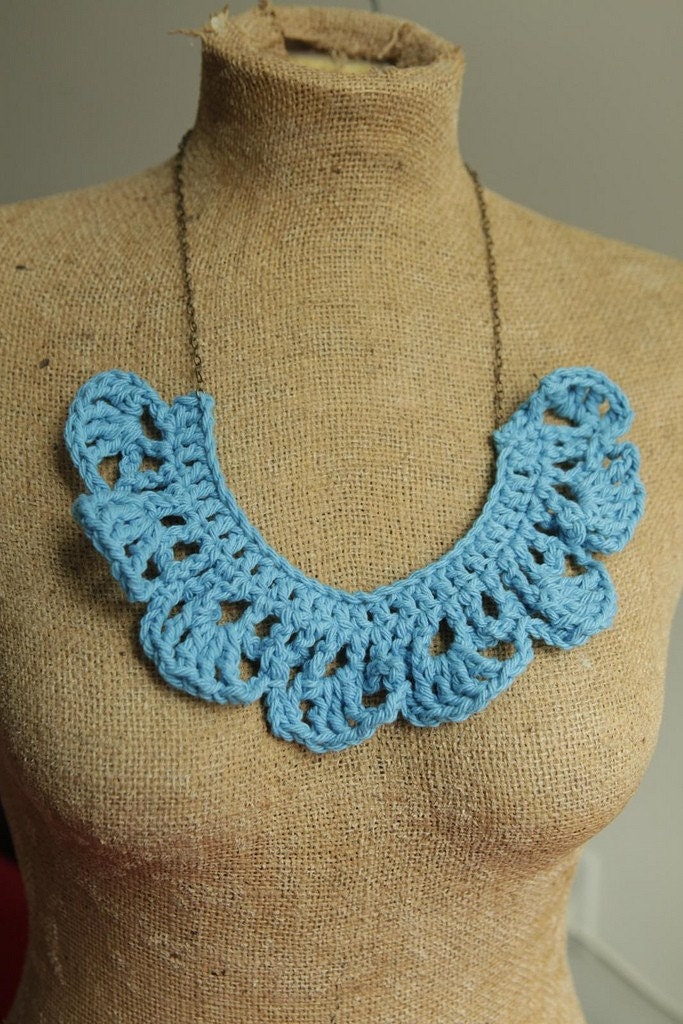
hey everyone, i'm giving away a ruffly crochet bib necklace from the shop to one reader! it's a 3 layer hand-crocheted necklace made out of a soft cotton yarn on a bronze steel chain. if you're not having luck with the giveaway you can crochet your own or pick one up in the shop.
to enter, just leave a comment below (make sure to leave a way for me to contact you if you win -- email or blog!).
for additional entries you can do any or all of the following (just make sure you tell me about it the comments -- and leave a link for any posts or tweets you do!):
* blog about the giveaway and link back to this post
* tweet the giveaway link
* follow ACT on facebook
* sign up for the mailing list
* follow on blogger
Enter before Oct 7 at midnight EST. the winner will be announced on Friday, Oct 8. Readers from any country are welcome to enter!
lately, i've been creating a bunch of new items for the shop, frantically taking photos and getting these guys posted. AND, i joined a new site, cargoh, where you can see all of my items (or most of them...slowly getting them all added).
cargoh.com seems like a pretty neat site so far. love their look, and they are a juried site so the content is pretty good. it's not just shopping either. they also feature bands, events, and other stuff. check them out!
the pattern for this coiled crochet medallion uses the bullion or roll crochet stitch. it's pretty fun to do, but takes a little practice before you can do it in one easy swoop.
the pattern and instructions for the little coiled medallion necklace is below...or if you're not so inclined to crochet, you can find the crochet necklace in the shop. bullion stitch instructions
the actual bullion stitch is done by wrapping your hook 5-10 times (start small for practice) somewhat loosely, but very evenly. insert into your foundation stitch, wrap once, pull through foundation st. wrap once and pull through all of your loops. wrap once and pull through last loop.
PATTERN
*size C needle
*small thread
you can use any size hook and yarn/thread that you like. the smaller the daintier!
Round 1 - create loop (to knit in round) and dc into loop 10 times
Round 2 - ch 3 st, then into each dc, do 2 bullion 10-loop stitches
tie off end and weave in ends. attach to a chain and you're done!
**Pattern is for personal use only - not to be reproduced for sale, nor to make items for sale**
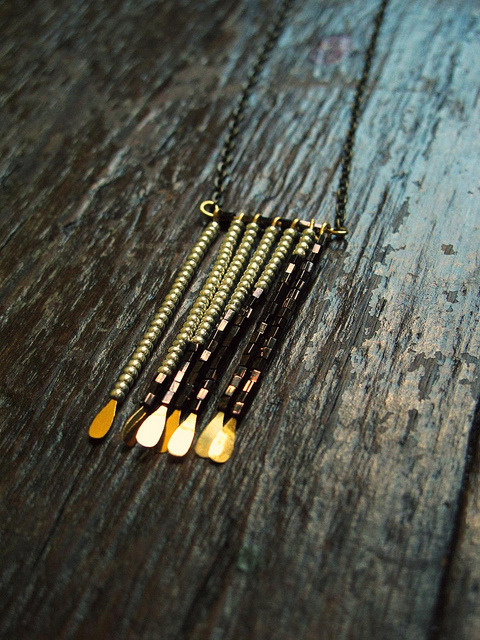
a while back i came across a very bright (and very expensive) mounsser necklace that i decided i could relatively easily make myself. i’ve been forever collecting bright-colored trinkets and hearts, and finally felt like i’d amassed the perfect dangly bits and the best matched gold chain, so it was time to put it all together.
it basically has a million little pieces that took forever to attach. but, i’ve set up my jewelry workspace to watch hulu to pass along the hours while i work. this necklace was happily made while watching episode after episode of 21 jump street (i was running out of tv options), so this necklace will forever conjure up an image of young johnny depp’s face every time i wear it.


 Now you have a new ring! You can get pretty creative with these, and soon you'll be looking for anything with a flat surface to make rings out of. You can also make rings from geode stones with a flat back, vintage pendants, sliced agate, stone chunks like pyrite, or even little knit items like bows or hearts.
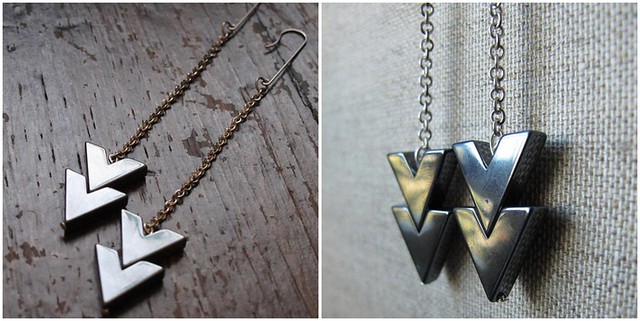


