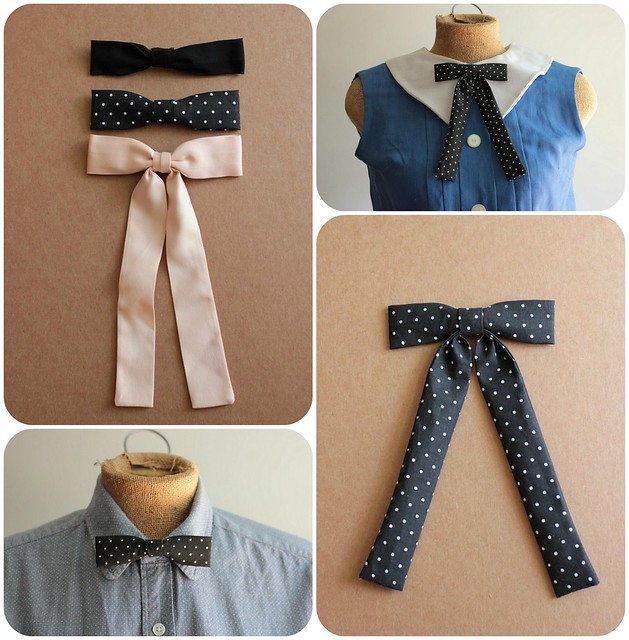
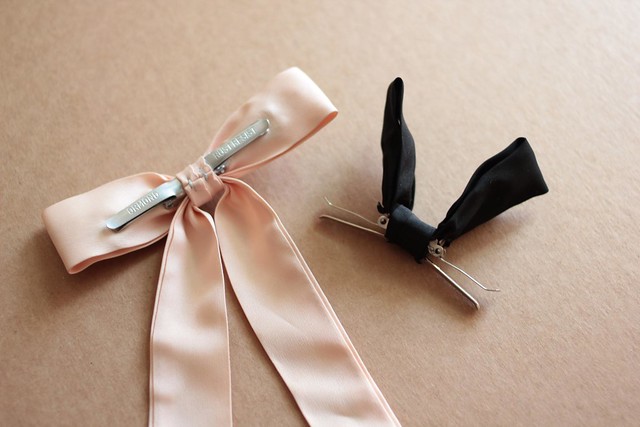
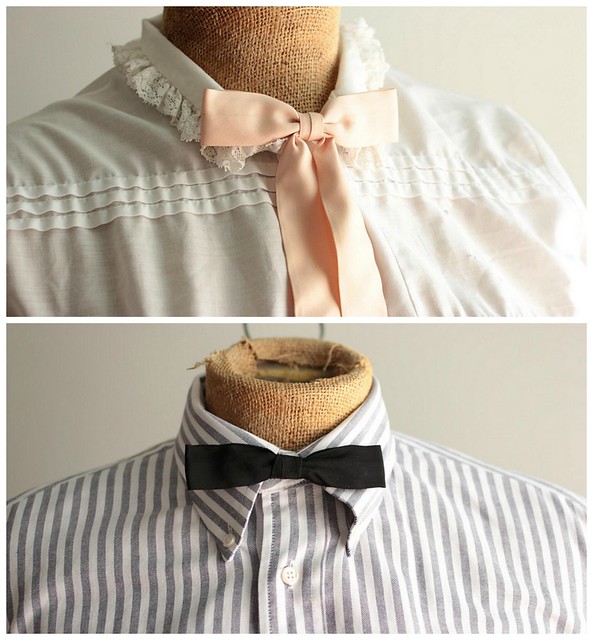
I've got a new DIY bow tie sewing pattern in the shop, that shows you how to make a skinny bow tie with a vintage style clip in the back. There's two different variations included in the patter: one for women when a long hanging tie, and one for men without the hanging tie. They are pretty quick and easy to make, with only a tiny amount of fabric, which makes them pretty addictive.
The pattern is based on the really cute vintage bowties that are super skinny and minimal. They sew up well with either a silky style fabric or nice cotton. I also like perusing the thrift store for shirts/pants/dresses made out of interesting fabrics that I can repurpose, since so little fabric is needed. They have been a good way to use up old fabric remnants I have laying around my craft room too.
The pattern is written for all skill levels, and covers all of the basics, like how to add a buttonhole. Also, I did some research on where to buy the bowtie clips and found that you can pick up a dozen of them for pretty cheap over at B. Black and Sons.
As you've probably guessed from my (sorta) recent pattern-testing posts, I've had a new shop in the works. And, it's finally open! It's called I Make It; You Make It and has digital PDF sewing patterns and tutorials. The patterns are mostly fashion related with a vintage-inspired twist. Through the years, fashionable sewing patterns have been hard to come by, which generally led me to creating my own patterns. Now I've been digitizing them, and writing up easy-to-follow, detailed instructions with photos to go along with the patterns.
As a follower of the blog, take 20% off any of the patterns by entering GRANDOPENING when you checkout, available until June 25th. You can have a looksy at the DIY sewing patterns in the shop, or sign up to get an email whenever a new pattern comes out (about once a month).
The Patterns
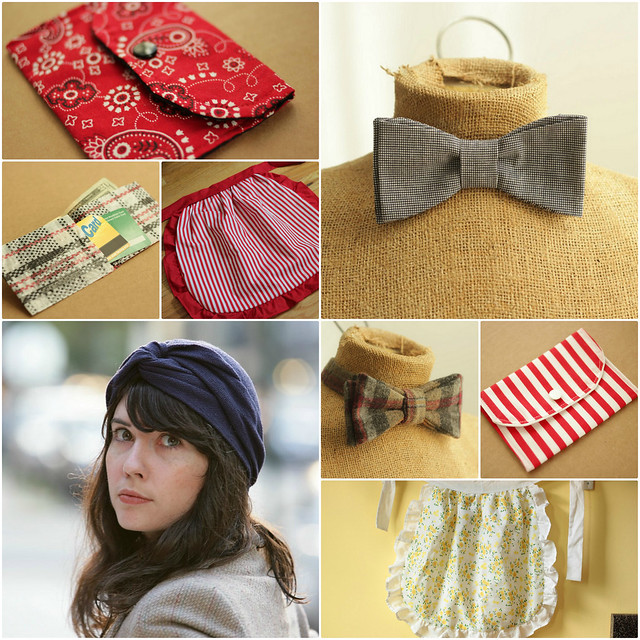
Right now the shop includes:
A men's bowtie that is custom-fit to the wearer and closes with a hook and eye in the back.
A women's turban made from a stretchy knit that wraps around for a custom fit
After finishing up this Amish Shadows Baby Quilt for my friend's new baby, I finally put together this basic pattern to cut out and make the squares used in this pattern.
Amish Shadows Quilt Pattern
You can download the Amish Shadows Quilt Pattern which includes pattern pieces for making the colored triangle. These pieces don't include the seam allowance though, so you'll need to add that in to all edges of all pieces before cutting your fabric. I typically use a 1/4" seam allowance for quilting.
You can use the pattern pieces to construct each square. For my blanket, since it was for a baby, I assembled 9 squares (each 10" square). Then I added 2 sets of borders around the edges.
To quilt the blanket, I stitched just inside of the lines for each triangle piece, then added a heart to the largest triangle section. The pattern also includes a template for the heart that you can trace onto your quilt.
Typically, I think Amish Shadows quilts are made with bright rainbow colors, and black as the base color, but it just seemed a little too dismal for a baby blanket.
Hopefully you'll enjoy the pattern and make your own baby quilt! Let me know how it goes if you do.
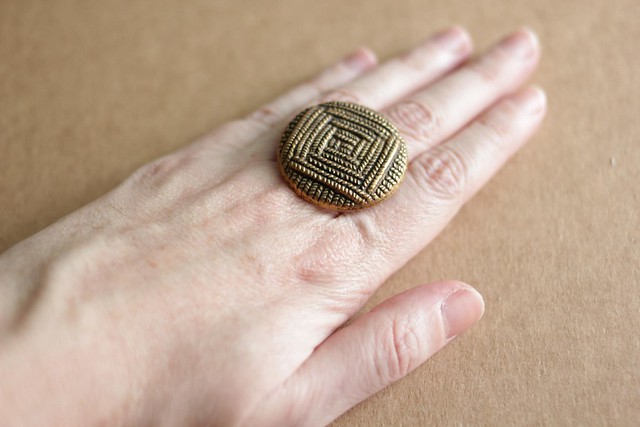
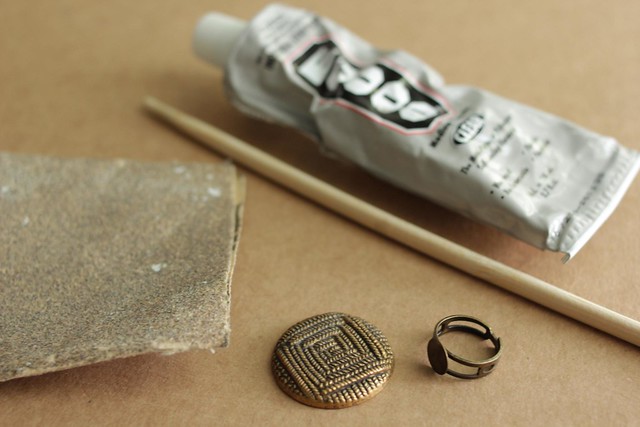
This is a tutorial to show you how to make a ring out of a vintage button. I see so many great vintage buttons, either randomly at a yard sale or thrift store or a part of an old sweater or shirt that I don't want to wear anymore. Buttons are little treasures that are great because they can be so fun, with a lot of detail. There's a bunch of stuff you can do with them, and I'm sort of button hoarder. If there's a nice set of them, I like to replace boring buttons on a shirt with fun colored ones. And below, is how to turn a button into a pretty ring.
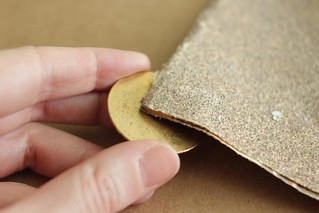
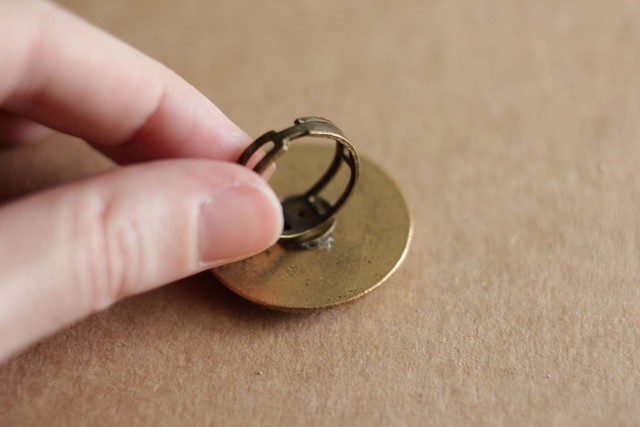
Using the sandpaper, gently sand the back of the button, and the flat surface of the ring blank. The flat smooth surface of the button/ring blank doesn't give the glue enough to really bond to, so by roughening up the texture a bit it will make your glue hold better. Make sure you don't go crazy here, and try to only sand the button where the ring blank will attach.
Step 2
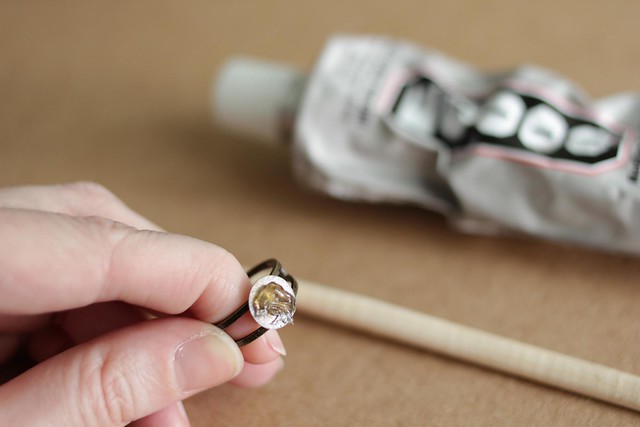
Apply a small dollop of glue with your chopstick to your ring blank. The key here is not getting too much. You want enough so that when you press the ring on it forms a solid layer, almost forming a suction, and only the tiniest bit peeks out the edges, but not so much that you have to wipe it off.
Step 3
Now press on your ring gently just enough that the glue spreads evenly across and you have a nice layer of glue in between. Don't press too hard where you squeeze all of the glue out of the sides. Now, set it aside and let it dry for a good 24 hours before you wear it.
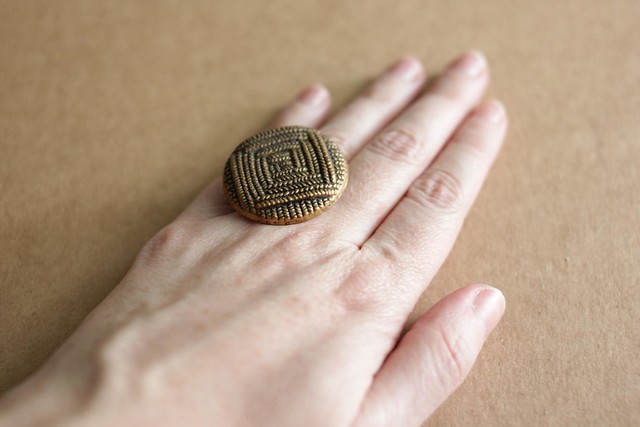
Now you have a new ring! You can get pretty creative with these, and soon you'll be looking for anything with a flat surface to make rings out of. You can also make rings from geode stones with a flat back, vintage pendants, sliced agate, stone chunks like pyrite, or even little knit items like bows or hearts.
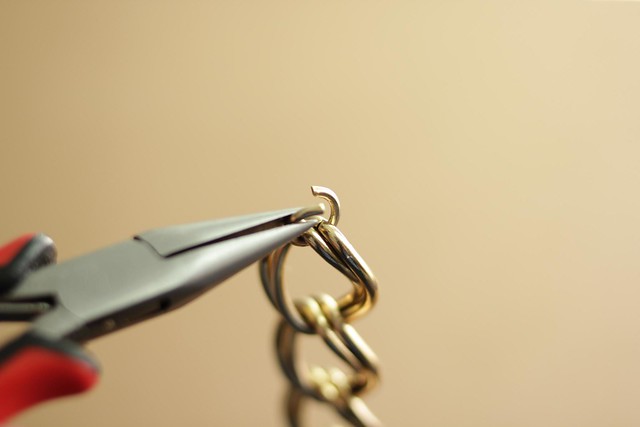
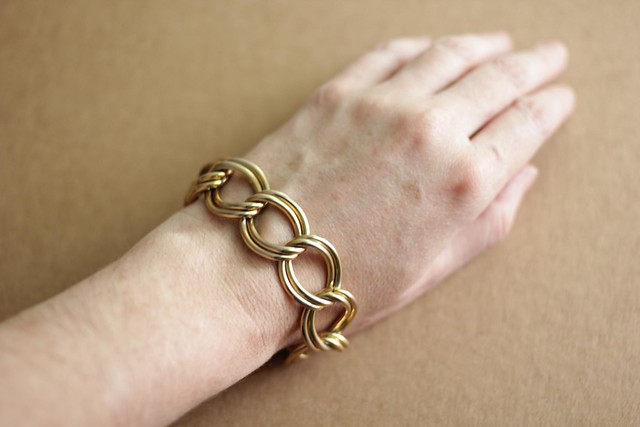
Here's a tutorial on how to make a basic chain bracelet, for your very own DIY bracelet arm party. I like the look of colors of the crazy circus arm, with friendship bracelets, chain bracelets, rhinestones and bangles, but sometimes it's nice to have just a simple, basic bracelet to throw on. The good thing is, this chain bracelet stands alone well, or can serve as a foundation to a crazy arm circus. And, the technique is simple, and you can apply it to any chain you find, so you can make all kinds of different styles.
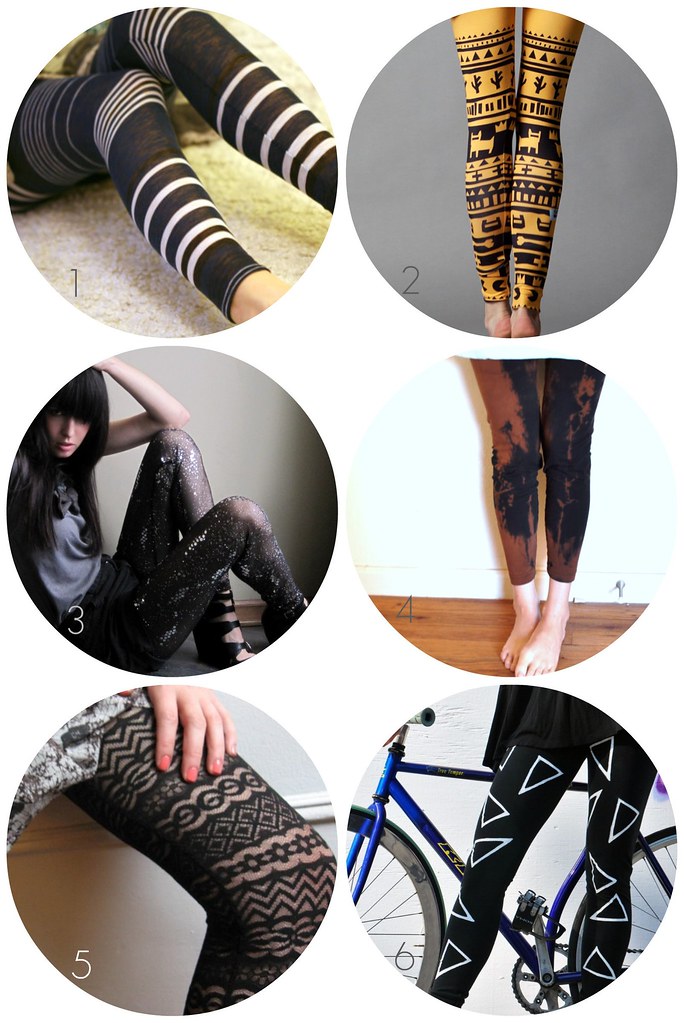
Leggings are popping up everywhere, and I love how fun they are! It's like having crazy pants and leisure pants, all built into one. Below are some of my favorites to buy, or if you're feeling crafty, here's a list of DIY leggings patterns to show you how to make your own leggings!
P.S. now I've got silly ZZ Top stuck in my head. When I was about 7, for some reason the She's Got Legs video translated for me "what it meant to be a woman". Lacy socks + heels. I saw the video and thought, I've got socks like that! I ran and put on my sunday school ruffle socks and a pair of my mom's heels, and wore them around the house thinking, So this is what it feels like.
P.P.S. speaking of heels...i am SO excited...I just spent the most amount of $ I ever have on a pair of shoes, and bought these PINK swedish hasbeens. I've wanted some for forever, and I couldn't resist 20% off via A Cup Of Jo with code ACUPOFJO.
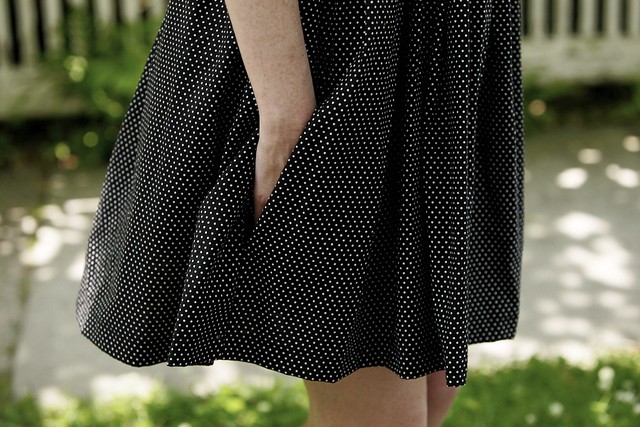
This sewing tutorial explains how to make a pocket, gives you a pocket pattern, and tells you how to add an in-seam pocket to any dress (or pants, or anything really), making it SO MUCH MORE USEFUL. Pockets are essential, otherwise, where are you going to hide your hands and uneaten snacks?
Keep reading for the pocket pattern/tutorial, or you can check out my other DIY patterns.
Step 1: Print out the pocket pattern (And start hoarding your snacks)
Download and print out the pocket pattern; cut out 4 pocket pieces. (the pattern stretches a little into the margins — sorry, i like big pockets!)
Step 2: Rip those Seams
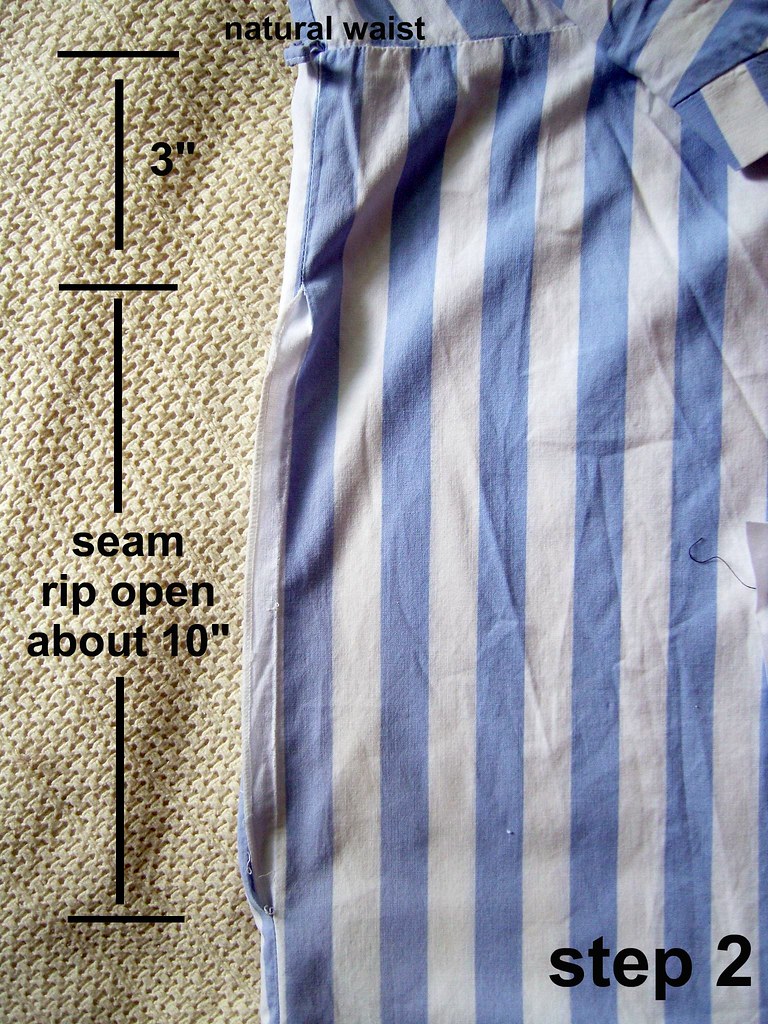
Beginning about 3 inches below the natural waistline, start ripping the seam until you have a 10" hole. **Note, this is your natural waistline, which is much higher than where your pants waistline is. Your natural waistline is a few inches above your belly button.
Step 3: Sew your Pockets
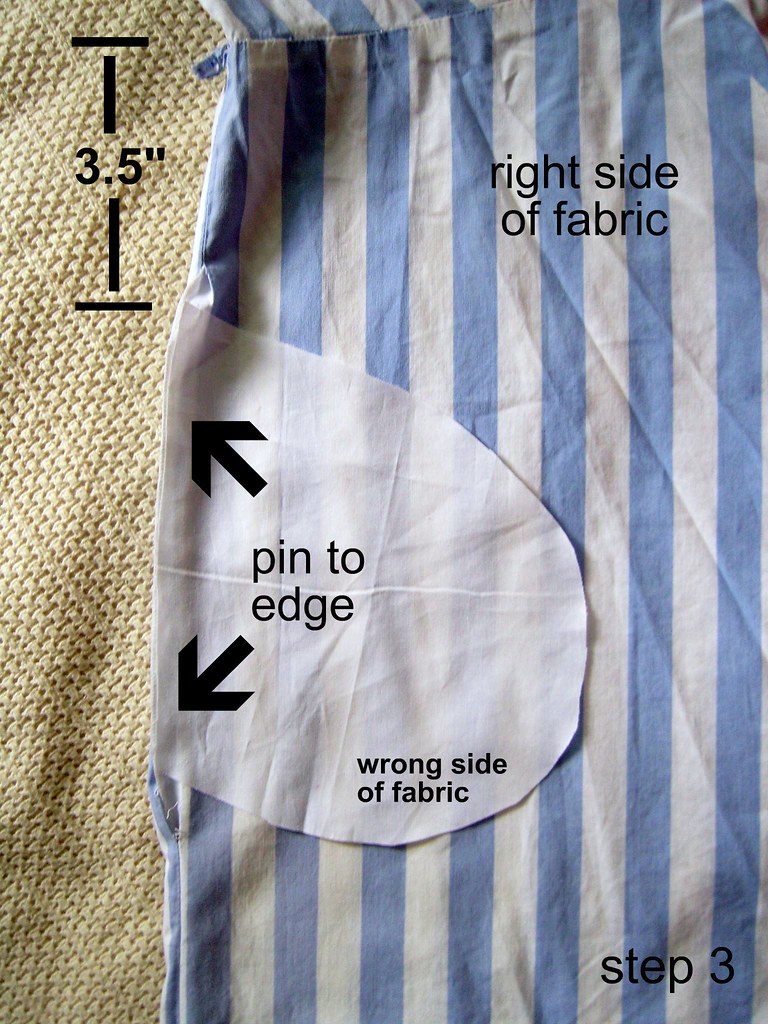
Place 1 pocket piece on the front of the skirt, right sides together, 3.5" below the natural waistline, lining up the edge of the pocket with the edge of your skirt. Pin in place. Now do the same thing on the back of the skirt, pin another pocket piece, in the same location (also, right sides together).
Step 4: Start Stitching
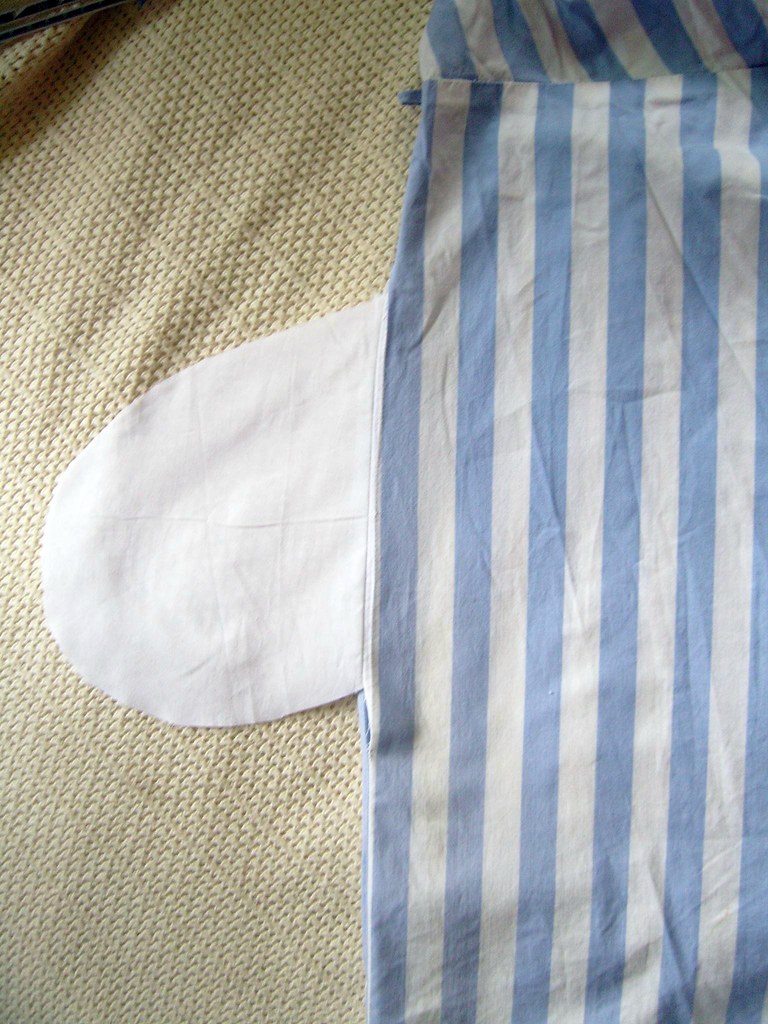
Stitch the front pocket to the front of the skirt, using 3/8” seam allowance. Stitch the back pocket to the back of the skirt the same way. (You are using a 3/8” seam allowance so that in the end, your pocket fabric actually starts a little inside the skirt seam allowance…making it invisible from the outside)
Step 5: Press
Press the seam open...
Step 6: Press again
...then fold over the pocket and press it flat.
Step 7: Stitch all the way around
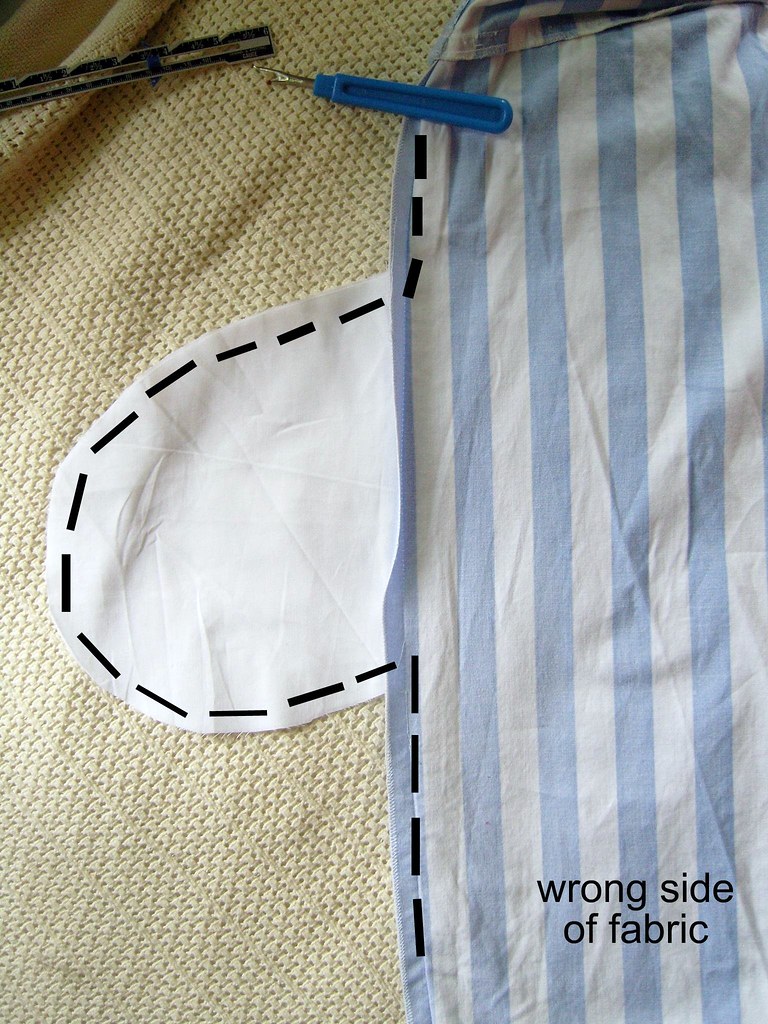
Turn your skirt inside out. With front and back skirt pieces right sides together, stitch along the seams and around the pockets using 5/8” seam allowance…in one continuous stitching line. Make sure your seam allowance matches the existing skirt seam allowance, and stitch over the existing side seams at the top and bottom just a bit to make sure everything is put back together nicely.
Step 8: Clip and snip
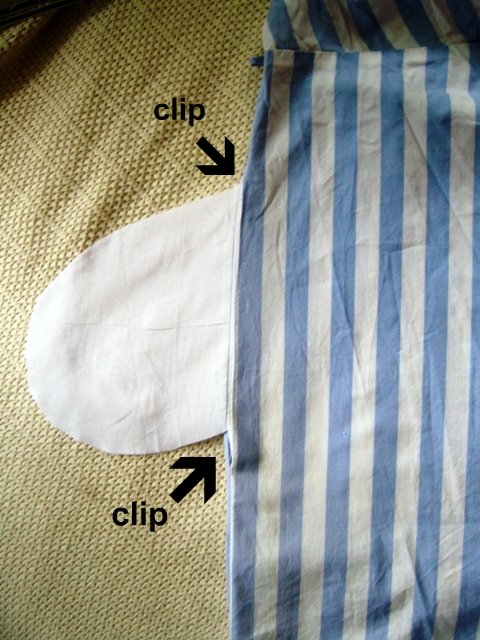
Clip into the seams where the pockets join the skirt. (This makes your seams lie flat without any bunching.)
Step 9: Finish things up
Press side seams open. Turn right side out.
Now, repeat steps 2-9 for the other side of the skirt.
Now fill them up with stuff!
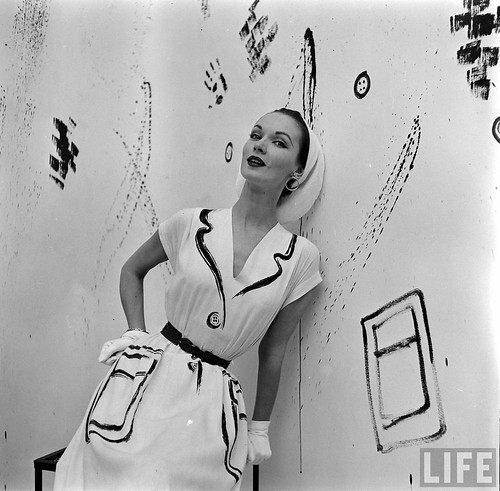
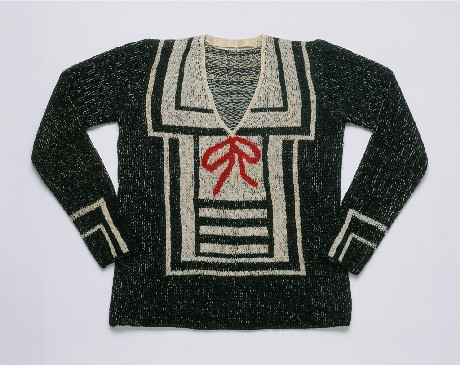
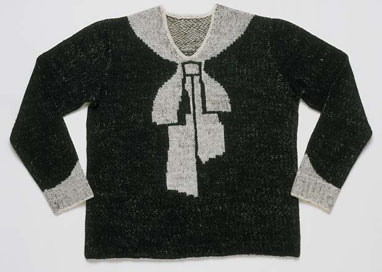
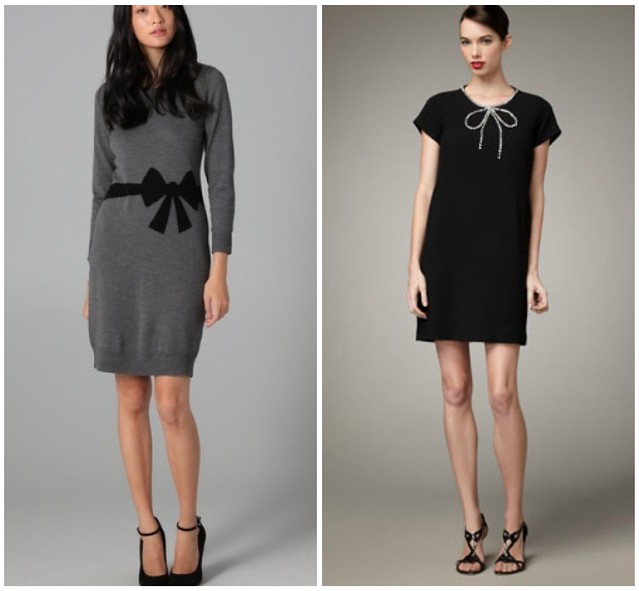
i discovered a few trompe l'oeil patterns and love them! trompe l'oeil is the 3D illusion created on a 2D surface. i think my favorite are these knit armenian bow sweaters (below)! they are adorable. although the hermes painted on cuffs and pockets (above) would be a much quicker and easier DIY to make a boring dress a bit more interesting.
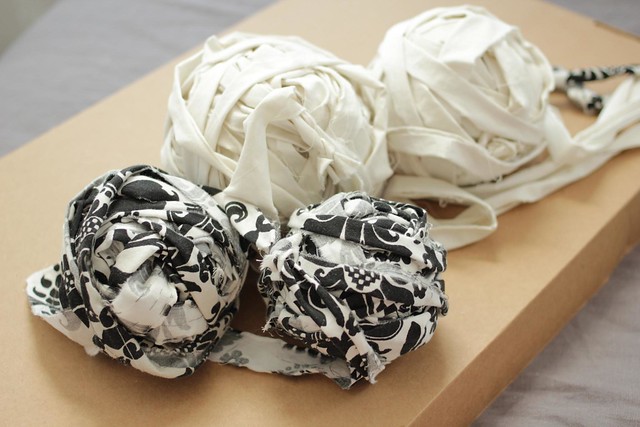
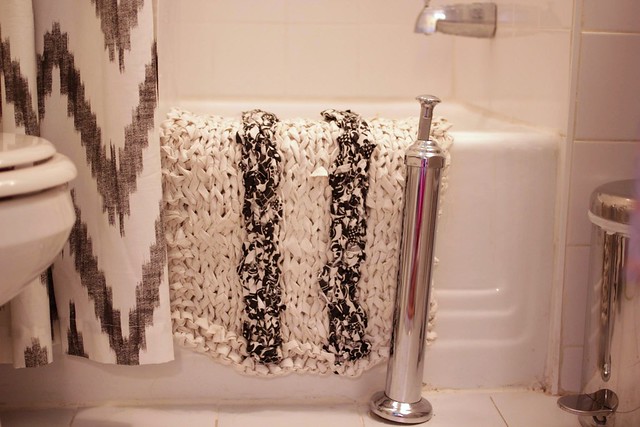
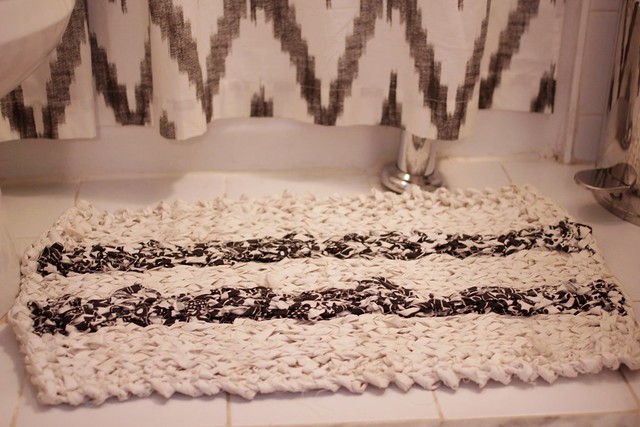
this is the finished rag bath mat for my new black and white bathroom, which is made from one half of a duvet cover, and 2 contrasting pillow cases. i created the 'yarn' from the duvet/cases using the rag bath mat tutorial then knit up the mat using the pattern below. you could just as easily use sheets or old tshirts for this project as well. in the end, the mat is super plush, and a great way to recycle your old linens. and, you get a fresh new look for your bathroom floor!
to make this, I only needed 1 side of a king size duvet cover and 2 pillow cases (and still had leftovers). when making them into 'yarn' i kept the pillowcases separate to easily make the fair-isle stripes, and 1 continuous ball for the main color.
to knit, i started with my main color, used 1 pillowcase for the first stripe, carried over my main color for the middle stitches, joined in my second pillowcase for the 2nd stripe, then again carried over my main color for the last set of white. since there is a fair amount of carrying over, i made sure to keep my yarn loose, and always carry over on the wrong side. the knitting on this is pretty simple -- just stockinette stitch with garter stitch borders (on all edges).
Striped Rag Bath Mat Pattern
Gauge: Varies - determine your own gauge to custom fit your mat
Needles: size 19
Yarn: made from sheets/duvet cover and pillow sheets
Finished mat size: 27" long
CO 22 stitches
Bottom Edge
row 1(right side): k2, k4 in main color A, k3 in contrast color B, k4 in color A, k3 in color B (by joining a second skein of B), k4 in color A, k2
row 2(wrong side): knit across row, making sure to knit with contrast yarn B as you come to it, and carrying your main A yarn in the back of your work
row 3(right side): knit across row, continuing your contrast yarn vertical stripes
Middle
row 4 (wrong side): k2, p til 2 sts remain, k2
row 5 (right side): knit across row, continuing contrast yarn vertical stripes
repeat rows 4 and 5 until about 1.5 inches before desired length
Top Edge
row 1-2: knit across row, continuing constrast yarn vertical stripes
row 3: knit across entire row ONLY using main color A (discontinue stripes)
BO all stitches
CO = cast on
k = knit
p = purl
sts = stitches
BO = bind off
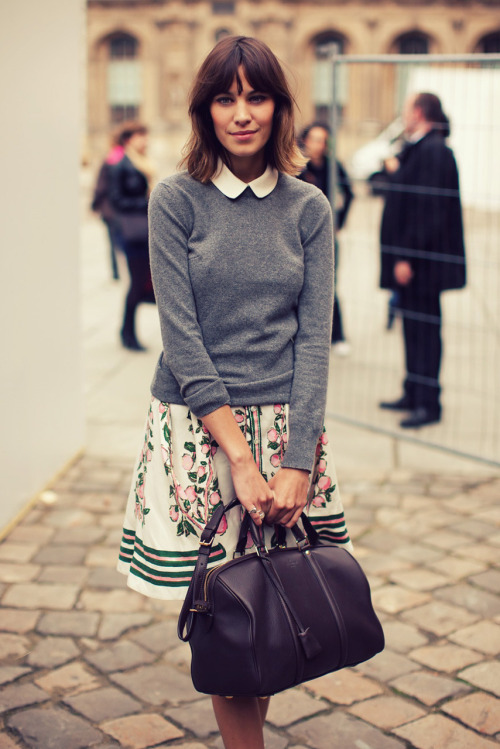
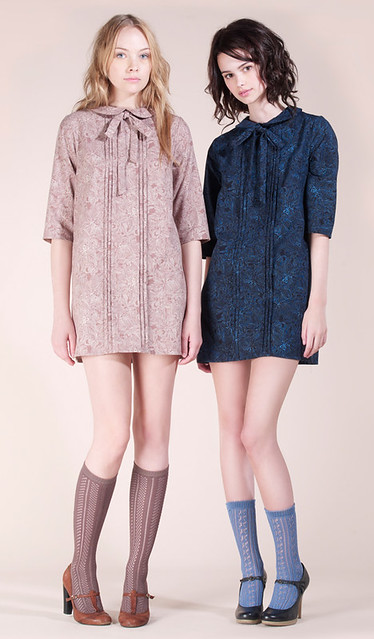
this DIY detachable collar pattern shows you how to make a peter pan collar with just a little bit of fabric and a ribbon. one thing i love is a good peter pan collar. obviously since i've mentioned this several times now. the best is making a portable one to mix and match with dresses or blouses or even tees. here are some of my favorites...
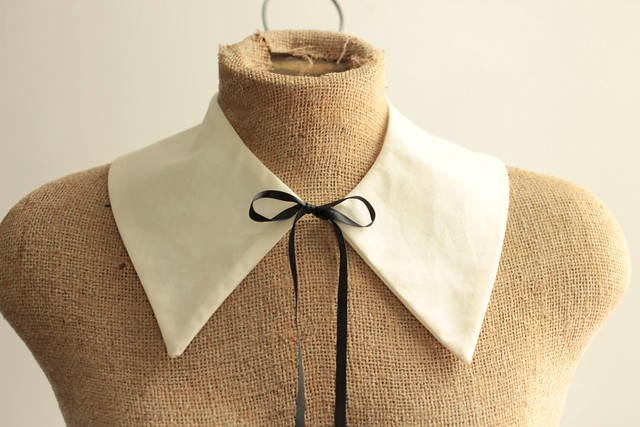
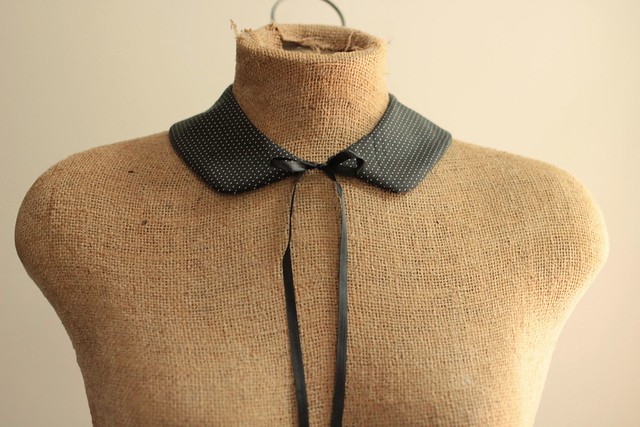
the detachable peter pan collar pattern comes in 2 different styles: mini peter pan collar and the pointy detachable collar. Both printable collar patterns are available in an 11 page booklet full step-by-step instructions, pictures, and sewing tips in the shop. You can read below for a description for a quick tutorial and an overview of the collar instructions, if you have your own pattern.
Materials & Supplies
* Pattern: mini peter pan, pointy collar, or your own
* 1/4 yard of fabric (cotton or a lightweight woven)
* Optional: 1/4 yard of light-med fusible interfacing
* 2 feet of ribbon (I used about 1/4” grosgrain)
* Notions: thread, scissors, tailors chalk, pins, needle
* Tools: home printer & 8.5" x 11" or A4 paper, sewing machine, iron
DIY Tutorial: How To Make The Collar
Step 1.
print out or make your own collar pattern. this pattern is designed to fit really close to your neck, to overlay high-necked dresses and blouses. if you want a deeper neck collar, or one that is perfectly fit to a specific neckline you have in mind, you can make your own pattern. just lay paper over the neckline of your shirt/dress, and trace around half of the collar (mid front, around the side to mid back), extend it out about 2.5” and round your front collar edge.
Step 2.
cut out your fabric and interfacing. double your main fabric, right sides together, and cut out 2 of the collar patterns (with the doubled fabric, that makes 4 pattern pieces). Optional: if you're using interfacing, then double your interfacing, right sides together, and cut out 1 pattern piece (which results in 2 interfacing collars). Iron your interfacing to 2 of your collar pieces
Step 3.
with right sides together,stitch 2 of the collar pieces at the back seams with a 1/2” seam allowance. repeat for the other 2 collar pieces. press seams open (important! don’t skip that!) and finish your seams (i cut them with pinking shears.) now you should have 2 pieces (complete upper and complete under collars)
Step 4.
pin your upper and under collars, right sides together. also, sandwich your ribbon in between the 2 layers, making sure to only catch the edge of the ribbon in the corner seam. the left collar edge in the photo above is flipped back so you can see the placement of the ribbon, and the right collar edge is what it will look like after you place the collar on top.
Step 5.
stitch all around the edges of the collar with a 1/2” seam allowance. make sure to leave a gap of about 2” to turn.
Step 6.
trim your edges to 1/4". clip curves and trim across corners. press seams open.
Step 7.
turn your collar right side out (through the hole) and use something sharp (a turning stick if you have one, otherwise a chopstick or knitting needle works great) to go all along the edges and especially corners to make sure it’s completely turned out all of the way. press flat.
Step 8.
hand stitch up the hole that you used to turn the collar using a blindstitch. basically just keep stitching the hole with the placement i have the needle above (where your thread stays on the inside and is invisible from the outside). if you need more guidance, here’s a nice short blindstitch video.
Step 9.
topstitch all along the edges. you’re done!
this collar is pretty basic, but there are so many variations you could do.
make it in a bright print fabric
use a contrasting thread for topstitching
make it oversized
make the edges scalloped
if you make the collar, let me know! send me photos! and you can also check out my other patterns and tutorials.









 Now you have a new ring! You can get pretty creative with these, and soon you'll be looking for anything with a flat surface to make rings out of. You can also make rings from geode stones with a flat back, vintage pendants, sliced agate, stone chunks like pyrite, or even little knit items like bows or hearts.