
every year, I try to make almost all of my holiday gifts, or give something handmade by others. handmaking gifts means you have to get an early start, so i'm starting a handmade gift series, featuring some easy tutorials for things you can make yourself to have your gifts ready by the christmas season.
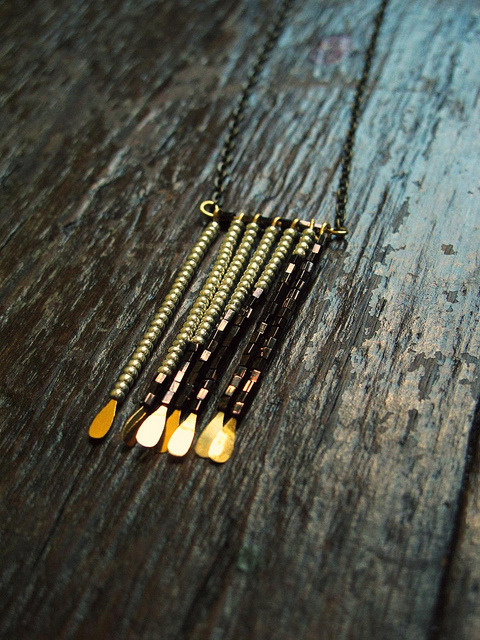
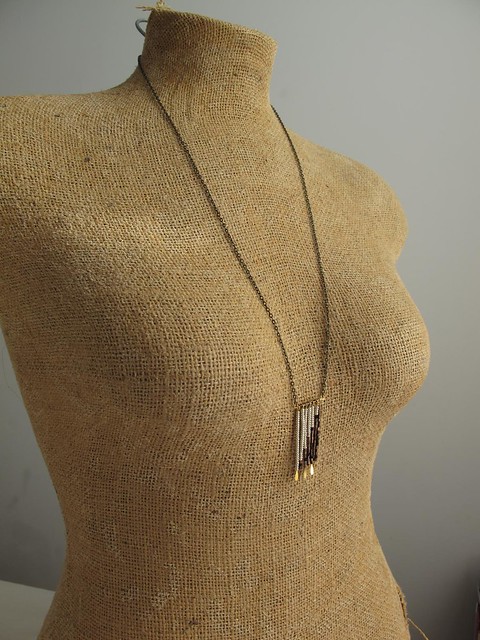
for the first post in the series, i'm making a geometric beaded fringe necklace, perfect for women. read below for the full tutorial, or pick a beaded necklace up from the shop, if making one is not your thing.
Materials:
to start, you’re going to need the following. you can pick everything up at your local craft store, like michaels.

* round nose pliers
* wire cutters
* chain - cut to 28” long (or your preferred length)
* beads — probably 2 colors. or lots. go crazy.
* head pins (little wires with a flat end)
* eye pins (little wires with a loop at the end)
Tutorial:
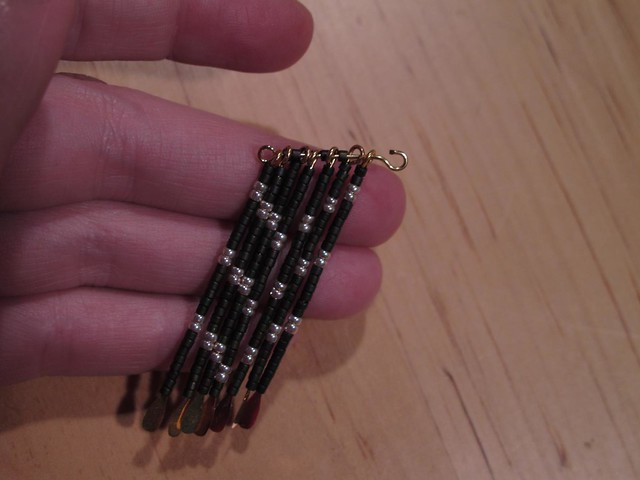
next, sketch out your design, based on how many beads you can fit onto each head pin. here’s one i did with a simple geometric colorblock triangle design, with 18 beads fitting on each headpin — a total of 7 pins.

next, start adding beads to your head pins.
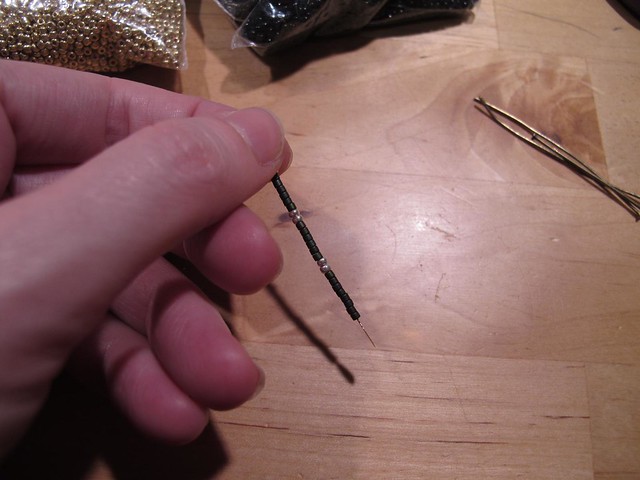
then, after your beads are on, take your round nose pliers, bend the top of the headpin to a 90 degree angle. (beads aren’t in the photo here, but they would be in your project.)

next, take your round nose pliers, grab the tip of the end of the head pin and rotate in the opposite direction of the bend, forming a loop.
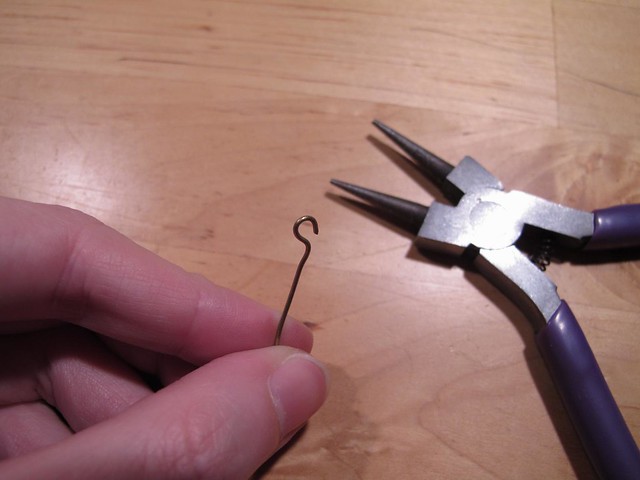
then close the loop all the way so it fits snugly against the base (you don't want it slipping off of your necklace!)

once you finish adding all of your beads, you’ll have a bunch of beaded sticks. now, take an eye pin (the one with a loop on one end already) and start threading them through (horizontally) each of your beaded sticks (vertical ones). make sure to put a bead on the eye pin in between each beaded stick that you have, so that they are space apart appropriately.
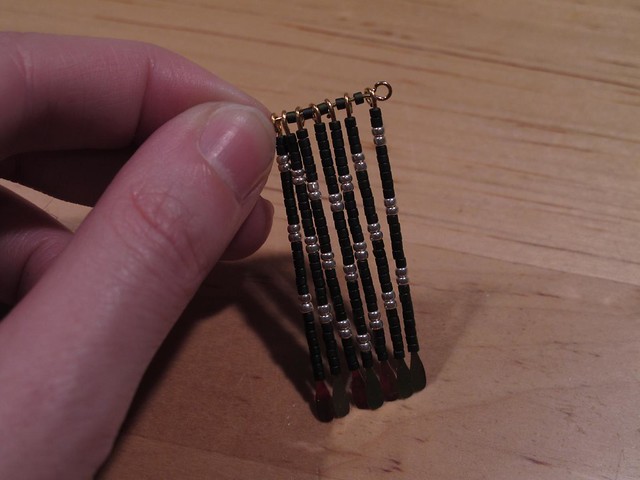
now, make a loop at the end of your eye pin, just like you did for the head pins — so that you have a loop at each end of the horizontal pin. now, thread your chain onto each of those loops at either end of the horizontal pin. close the loops tight so the chain doesn’t come off.
that's all! layer it on with other necklaces or wear it all by itself.
check back next week for the next gift guide tutorial.
5 comments:
Thanks for this great gift guide tutorial. This necklace looks great:)
What are those rounded beads at the bottom of the head pins called? They're pretty!
Hannah, the head pins used are flattened at the bottom, rather than beads. You can buy head pins with all types of 'ends'.
Your photos are gone! :(
Thanks! Photos are all fixed now.
Post a Comment